This 1958 United Bonus Bowler (ball bowler) came in with a Genco rolldown “Lucky7” (which will will see on this blog shortly), and the Genco was really what we wanted (there’s already two ball bowlers here, and no need for a third.) Here’s what was done in the repair process.
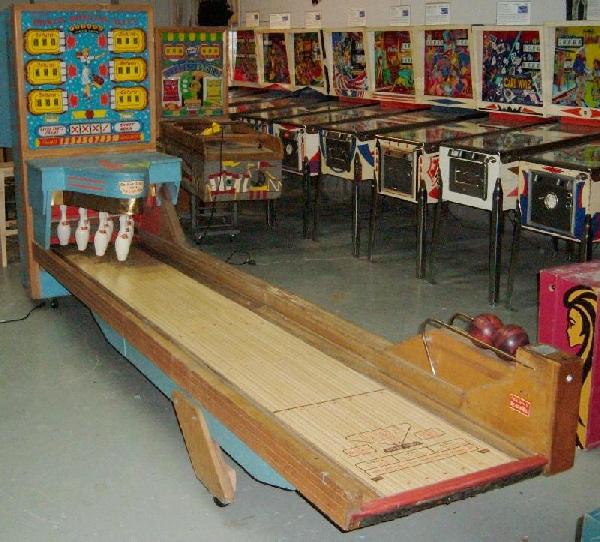
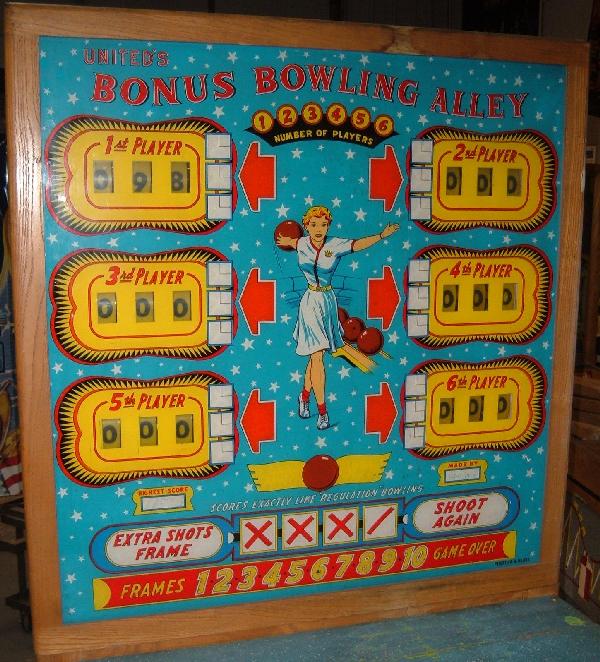
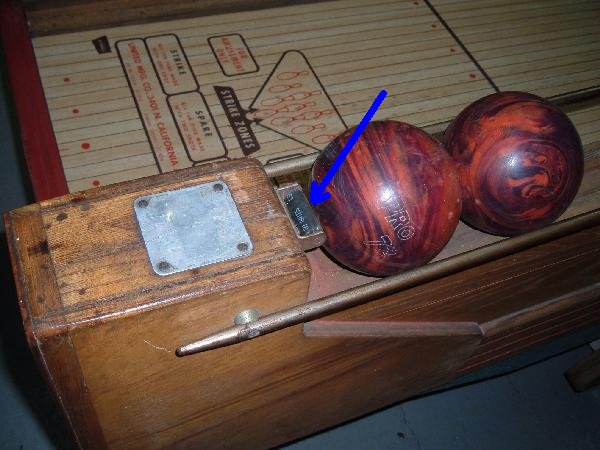
Here’s a close up of the bowler’s score glass. Note the 6 player format. This means lots of work cleaning and servicing score reels. But the good thing about this game is it’s a big ball bowler (meaning it uses 4.5″ balls.) Also the overall game length is 13 foot. 1950s United ball bowlers work well in 13 foot format. That is, it doesn’t feel like a 13 foot bowler, it plays and feels more like a 16 foot model. That’s because the backbox depth is pretty narrow (unlike later 1960s ball bowlers, where a 13 foot model feels really short because of the increased depth of the backbox.)
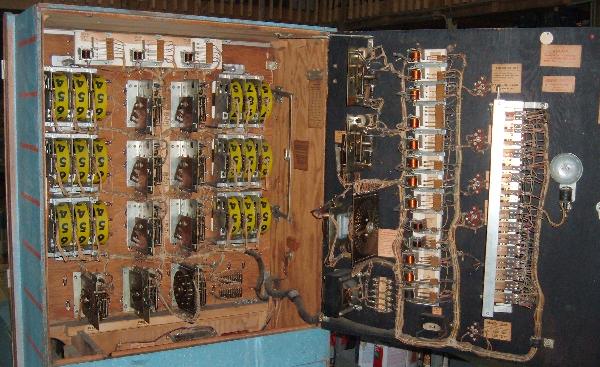
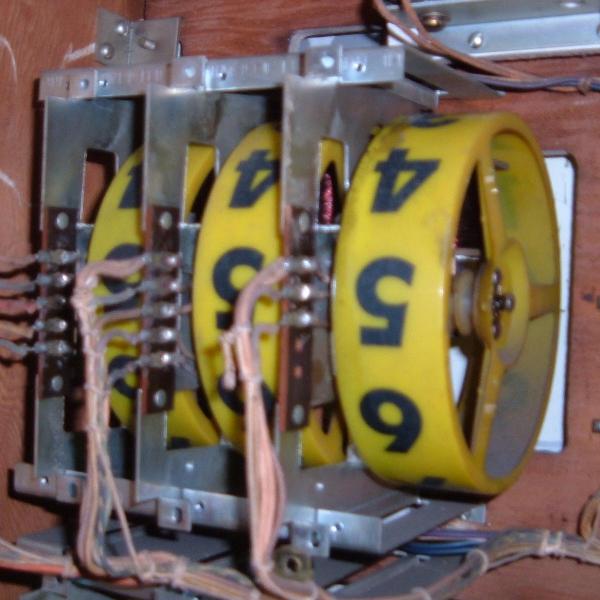
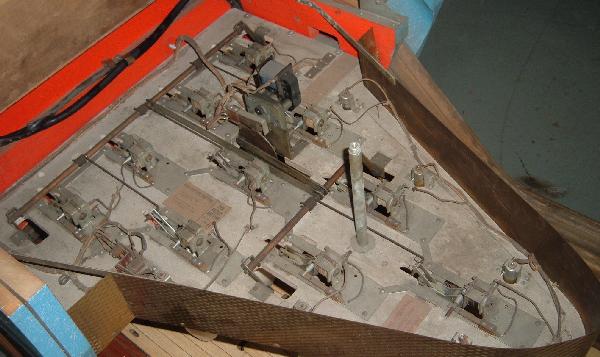
Here’s the guts of the game. Everything is shown here in the backbox, except for the pin deck, which we’ll get to in a minute. Note all the score reels! That’s 3 reels times 6 players, for a total of 18 score reels. Each reel will need service too, as the grease used to originally lube the reels has solidified. This means the reels won’t advance. Not much point in playing the game if the score reels don’t move.
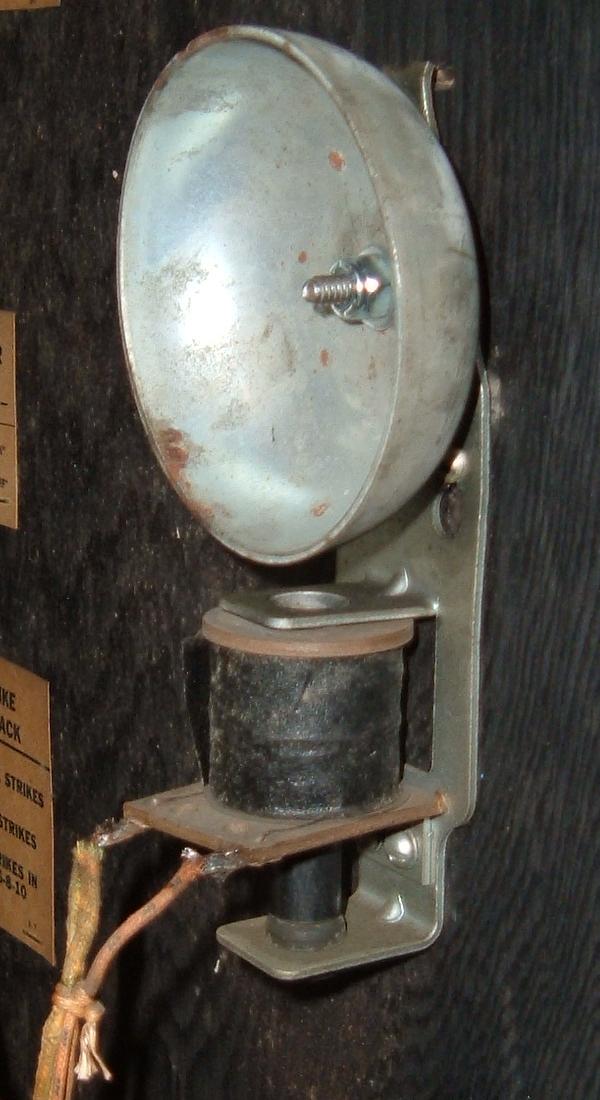
Sometimes we do the easy things first before getting into the hard stuff. In this case, the bell was broken. The constant pounding of the plunger against the bell had broken the bell mount bracket. We could just replace the entire bell with a Gottlieb bell assembly (available new from Pinball Resource), but that’s costly ($35.) Instead we can just buy a new bell itself (again Pinball Resource, about $5), flatten the mount bracket, and drill a hole. Then bolt the new bell onto the bracket with a #10 screw and locknut, and a nylon washer. A new (short) Bally bell plunger is then installed. There, a new bell for our baby. Ya must have a bell, as you need that vocal reassurance when you get a strike or a spare!
So now that the bell is fixed, it’s time to do some real work. That is, service the 18 score reels. What a bitch, but it has to be done.
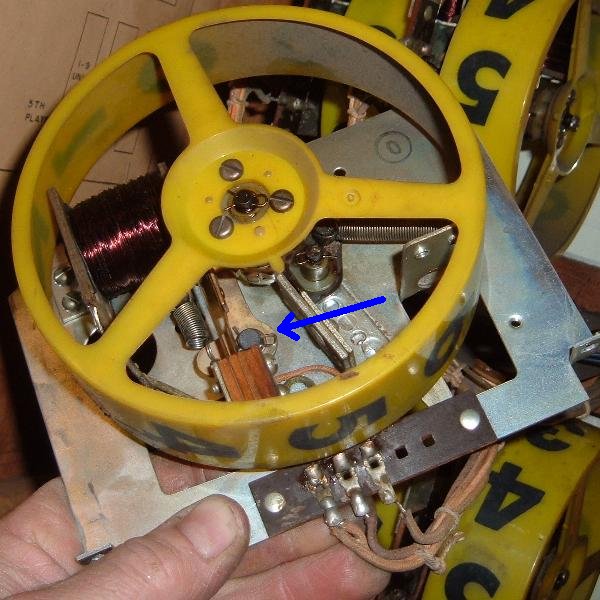
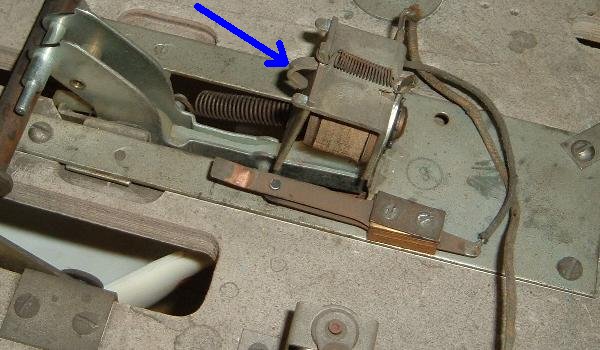
On each reel the part that is really gummed is this little lever, shown in the picture below with the blue arrow. To get to this part, the yellow plastic reel is removed, the retaining clip removed, one screw holding the switch removed (and the switch swung out of the way), and then the lever can be taken off. On some reels the grease was so solidified that the lever would not come off! To loosen it, I sprayed some “Brake Cleaner” on the lever. This stuff really degreases well, and allowed the part to be removed. Then all the old grease is cleaned off with alcohol. Re-assembly with a light film of Teflon Gel Lube on the metal-to-metal moving parts (only.) Rinse and repeat for the other 17 reels. Joy. If you want to take a short cut, just do the player1 reels. (That way you can test the game in single player mode, and go back and do the other 15 reels later.)
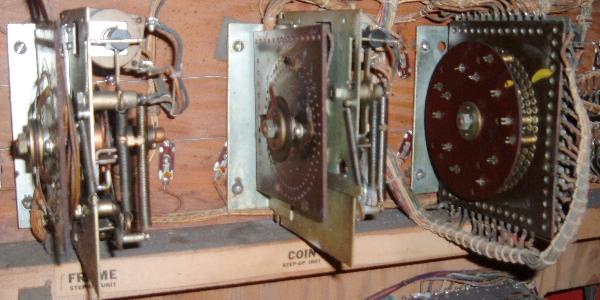
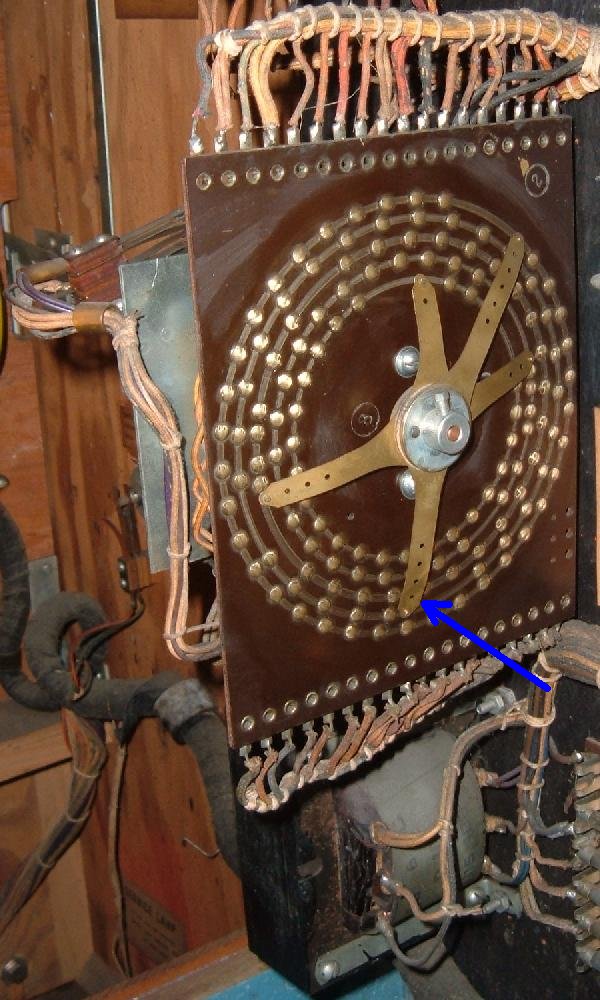
Now that the score reels are done, time to move to the stepper units. I always do the Frame, Coin and Player stepper units first. The game absolutely won’t work without those operating perfectly. Take the moving bakelite plate off (except for the Coin stepper, it doesn’t need to be removed), and clean the stationary brass rivets with 400 grit sand paper. Then lightly lube with Teflon Gel lube. Re-assemble and check for operation. By the way check out the factory yellow paint marks on the Player unit. That’s there to help you re-assembly the Player unit correctly.
Now it’s time to do the player’s strike/spare stepper units. There’s one of these for each of the 6 players. These are easy to do, and generally don’t require dis-assembly. Clean the stationary bakelite plate with 400 grit, and lightly lube with Teflon Gel Lube.
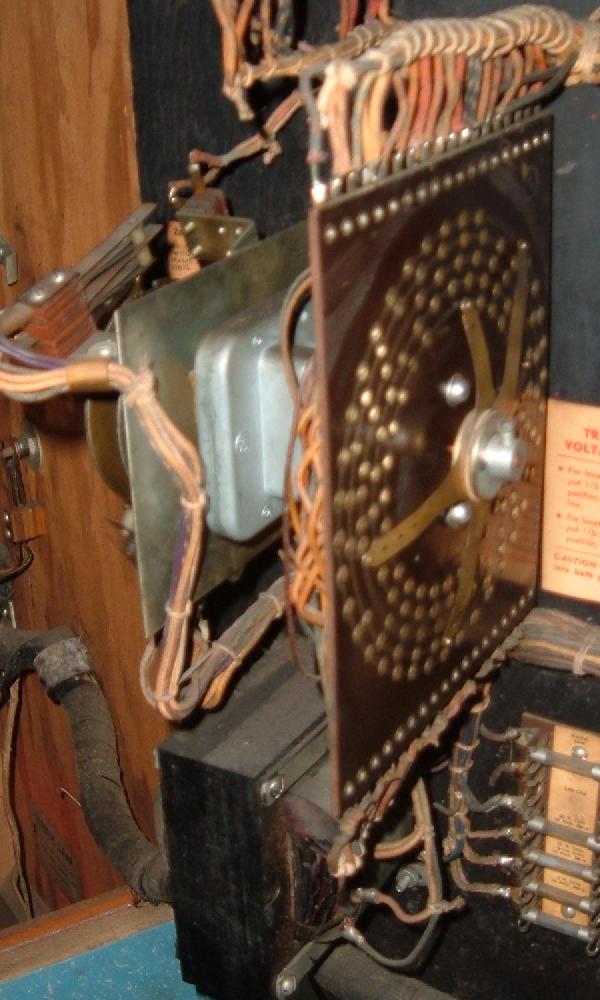
Last up is a motorized stepper, the Score Motor. Again clean and shine the stationary brass rivets with 400 grit. Examine the moving rivets on the ends of the “fingers.” If they are well worn, replace them with new tungsten contacts (available from Pinball Resource.) Again lightly lube with Teflon Gel Lube. Also check the motor switches for proper gap and tension.
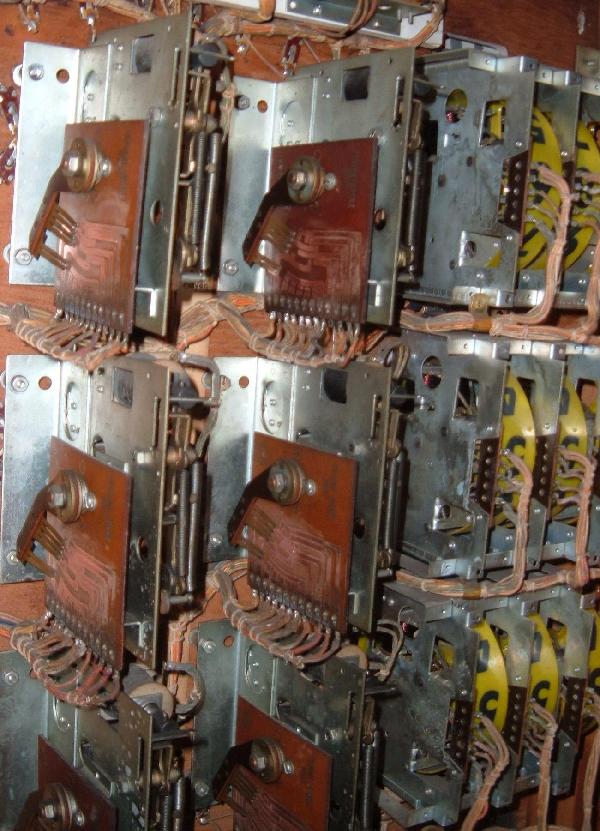
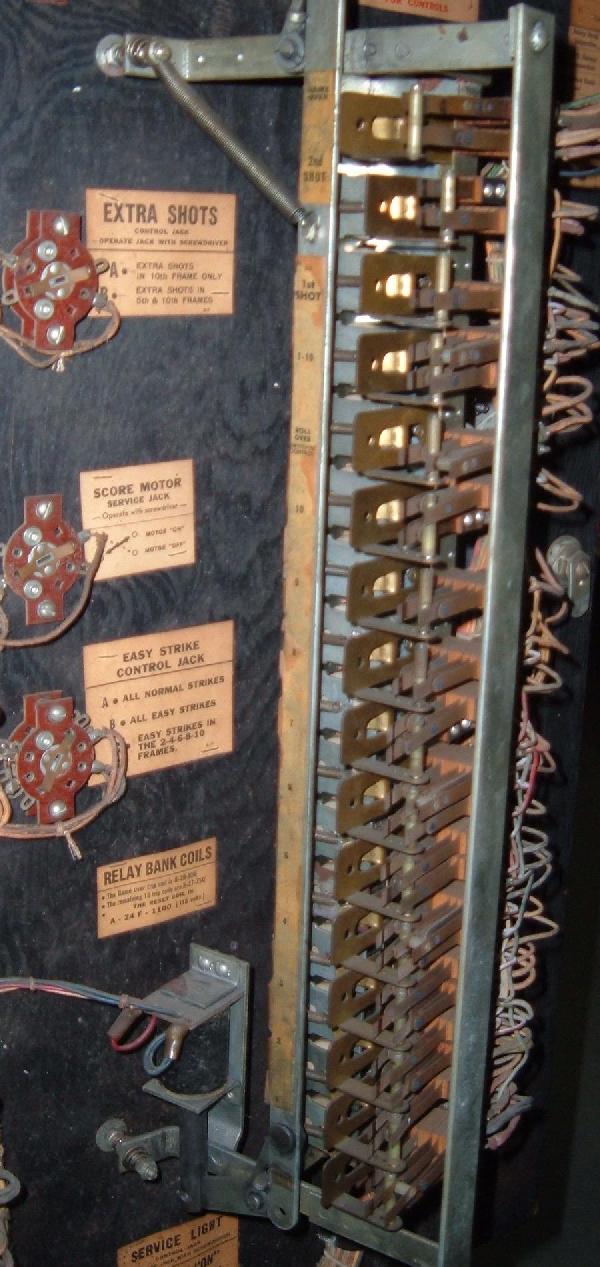
Next up is the relay bank. All switches are checked on this bank for proper adjustment. Then all the individual relays on the back door are checked too. Correct gapping is important, as this gives a “self cleaning” action to the switch contacts. Also look for burnt contacts and broken wires on all switches and relays.
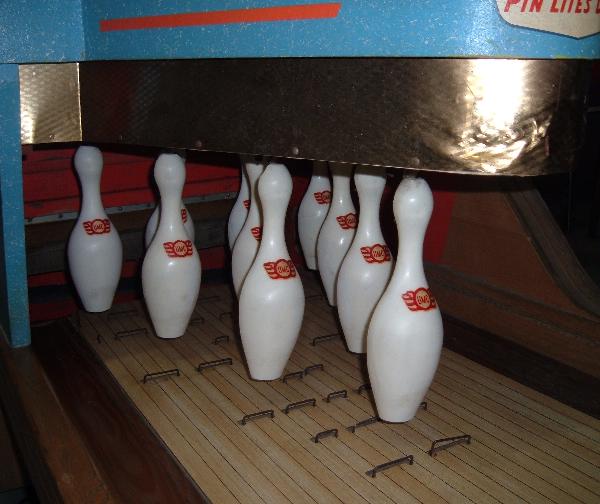
Time to move to the pins. At this point I do some mindless cleaning of the pins. Used Mean Green and a Scotch bright green pad to clean the pins. They came out pretty good.
On the lane one of the activation switches was broken. This is really common, as constant pounding by the ball breaks the switch activator. Below shows a picture of the switch activator that was broken (missing), and is now replaced with a new one. Where do you get a new one? Well you have to make it.

Making a new switch activator isn’t that difficult. First remove the deck lane with the pin switches. This is just three screws and this lane section slides out. Now what I do is buy a sample pack of piano wire from Pinball Resource. There’s about 5 different sizes in this pack, just make the wire to the existing switch activators. Then using some pliers, bend a new activator switch out of the piano wire. It’s not that hard to do, it just takes a bit of patience and constant comparison to an existing (unbroken) activator. While you have the lane panel removed, check/adjust the game on all the lane switches.
Lane switches are now done, time to look at the pin deck. This is the unit where the motor resets the pins, and relays pull in to retrace the fly-away pins when hit.
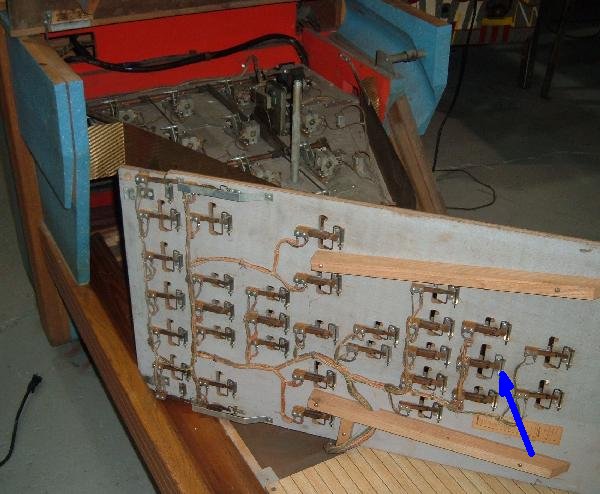
Below is a picture of a single pin’s relay on the pin deck. The blue arrow shows the latch plate retainer. This retainer needs to be bent so only the lightest amount of pull from the relay will release (retract) the bowling pin. On every bowler I’ve ever worked on, these need to be adjusted. Over time the retainer bends back, allowing too much relay latch plate travel, giving inconsistent bowling pin retraction.
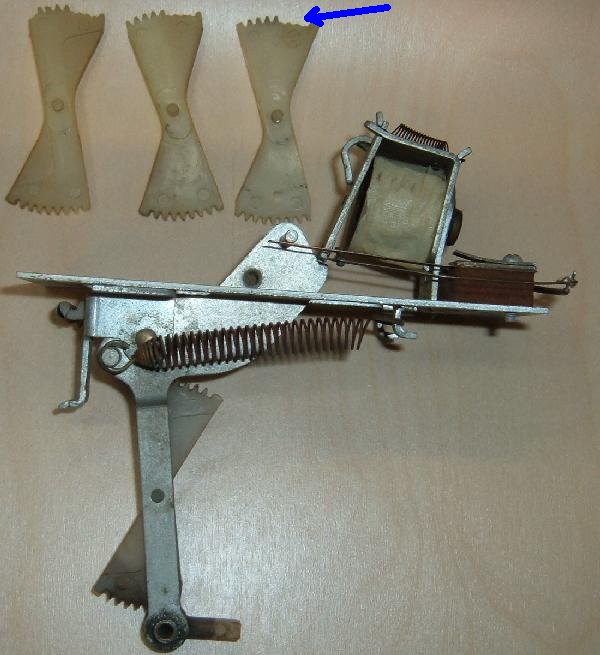
Below is the entire pin retraction relay/mech removed from the game. In this picture, the mech shown is complete and working. The three “bow tie” gears above the mech are broken. This game had three pins that would were “floppy” as the bowling pins reset. They flopped because the gears on their bow ties were missing teeth (as seen below, blue arrow.) This is very common on United bowlers. This is definitely a weak point in United bowlers of this era (for comparison CCM bowlers have a more elegant and sturdy pin retraction mechanism.) To fix this new bow tie nylon gears can be installed into the current pin retraction mechanism, or the entire assembly replaced. (I had new bow ties, so they were inserted into the existing mechanisms.)
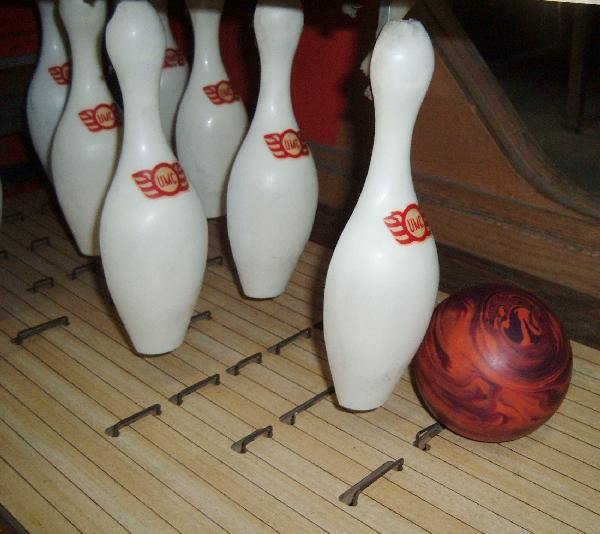
So you may ask, “why do these bow tie gears break teeth?” Well on the early ball bowlers the pins are right down on the lane. In theory, if you don’t throw the ball too hard, the ball never touches the pins. The ball hits the lane switch in front of the pin, and the pin retracts out of the way of the ball. Yet if the ball is thrown hard (fast), there’s isn’t enough time for the pin to clear the ball. So the ball pushed the pin backwards, and after doing this a zillion times, the bow ties’ gear teeth break. Moral of the story – there’s no reason to throw the ball hard on a ball bowler (it’s all about accuracy, not speed.)
Now United changed things around a bit as time progressed to put less strain on the pins. First thing they did was to move the lane switches about 1″ forward. This gives more time for the pins to retract. They also raised the pins too, so the top of the rolling ball just barely makes contact with the bottom of the pins. These two things really helped extend both bow tie and pin life. (Unfortunately it doesn’t look as cool though, as this Bonus Bowler really makes the player feel like they are influencing the pins.)
Last up was to service the “ball pit” area. This gets really dirty, and just cleaning the ball pit with a vacuum and then Mean Green goes a long way. New rubber can also be installed for the “flaps.” The rubber can be procured at Tractor Supply Company and is known as “bailer’s belt.” On this particular game the red “V” rubbers were in great shape and just needed some cleaning. The flap rubber was decent, so I didn’t end up replacing it.

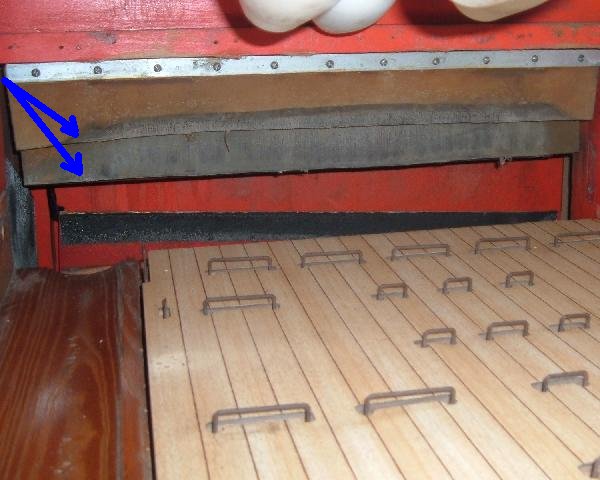
On the ball return tray the front edge needed a new piece of rubber. Here I just use fuel line, cut to size. This way when the ball comes down the return lane it doesn’t bash into the coin box ball stop. This little piece of rubber goes a long way in making the balls return without a “clunk.”
That completed all the service and cleaning done on this game. Obviously you can take this up a notch, and sand and clearcoat all the natural oak wood, or even repaint the cabinet. A lot of guys do that but I try to avoid it (assuming the original finish is decent.) Once a game is repainted, no matter how well, there’s no going back. I like original finish, but that’s just my personal preference. The Formica lane did need some serious cleaning with Mean Green and a Scotch bright green pad – there were some disgusting stains. That really cleaned up nice and the lane looks great.
Another interesting thing about this bowler were the motors. They were all in good working order. Usually I have to take them apart and at minimum clean the needle bearing. None of these motors (ball lift, pin reset, score motor) warranted this work. There was only one issue, and that was the speed of the score motor at start up. During the first frame or two the score motor was slow. This creates problems as the timing for the reset of the pins is important, as it syncs with the score motor. So if the score motor is slow, and the reset bank doesn’t get reset when it should (via the score motor), the pins won’t stay down. So it’s important to get this issue figured out.
The first thing checked was the tension of the blades as they touch the rivets. The blades can’t put too much tension on the stationary rivet plate, as this will increase drag and slow the motor. So the blade tension is reduced a bit by gently bending the blades just a little.
Next the metal cam is examined. Again the switch blade tension against the cam needs to be minimized. Also the edge of the cam is polished.

Here’s the cam removed and the edge polished. After making these changes the score motor behaved much better. A next step would be to take the gearbox apart and clean out all the old grease, but after the above changes it worked much better and didn’t warrant gearbox disassembly.

Now the game plays great. It’s a nice solid bowler with a classic look. Someone should be very happy with this game.