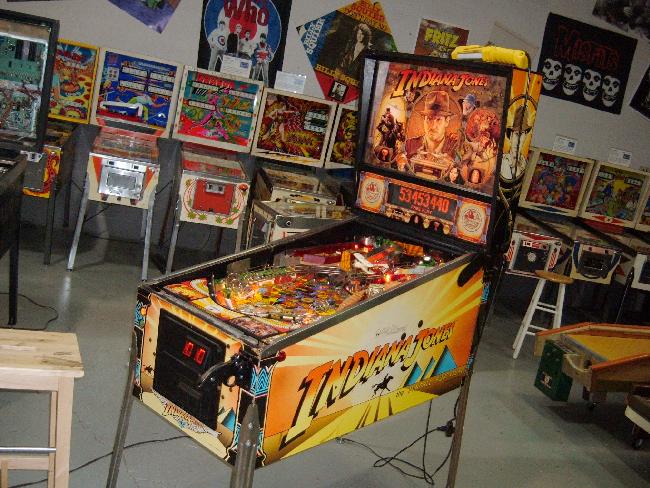
So we went on a small buying spree and got a couple 1990s Williams WPC style pinball games with that there fancy dot matrix thingy. The first game was a 1992 Williams Getaway (High Speed2), and that repair/restoration went pretty quickly. Other than some nasty battery corrosion, it wasn’t too hard to get that game playing and looking good. It was the 1993 Williams Indiana Jones that was more of a challenge, hence this blog entry. Both these games were “re-imports”, meaning they were made in Chicago then exported to some foreign land, and then brought back here in a big container. In the case of this Indy Jones it was pretty hammered too, it looked like it had a lot of miles. Our job was to make it fresh again.
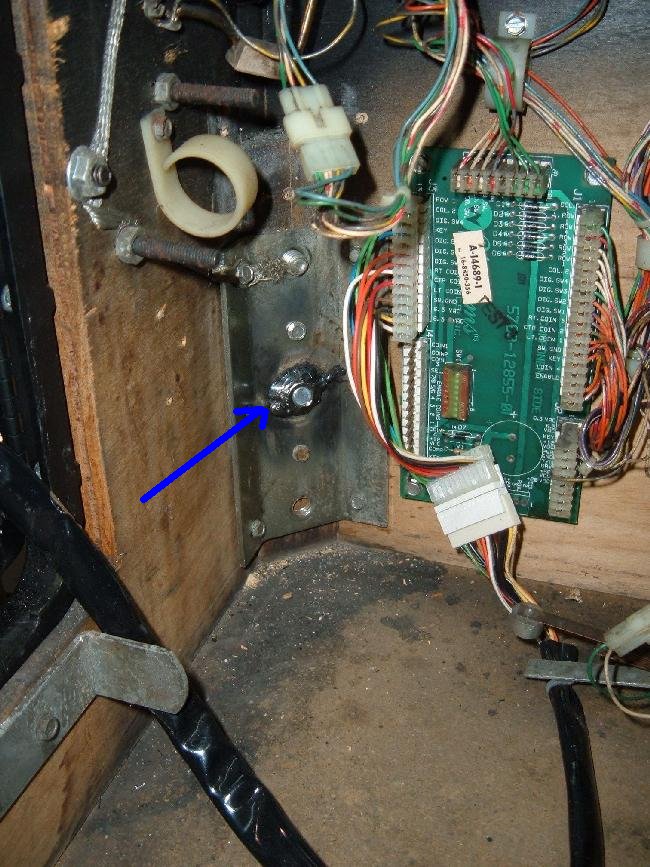
First up was just assembling the game. One of the leg plates had a stripped bolt. Since these newer games are so heavy, there’s no getting around this, you need that bolt. There was a couple choices here – replace the leg plate, or weld a nut to the existing leg plate. I went with the welding idea since I had an arc welder handy.
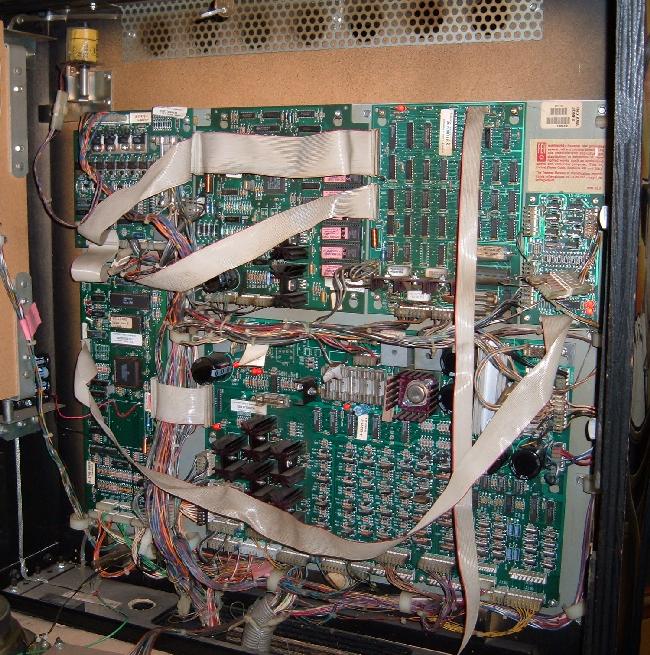
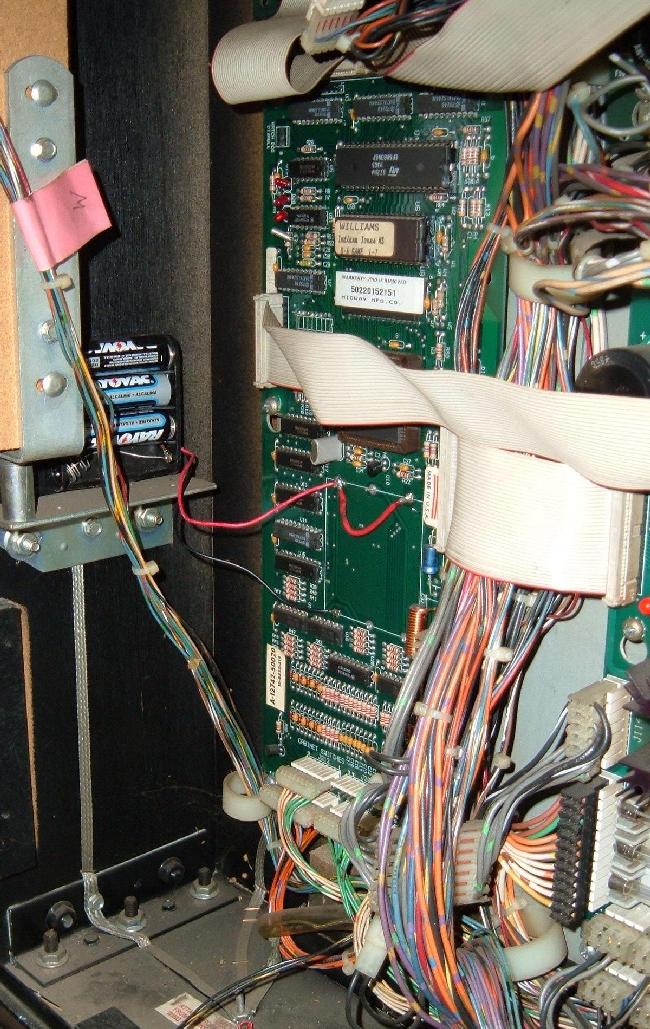
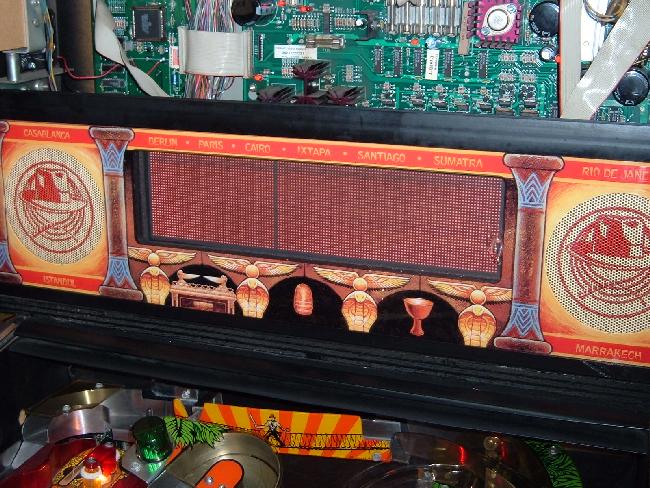
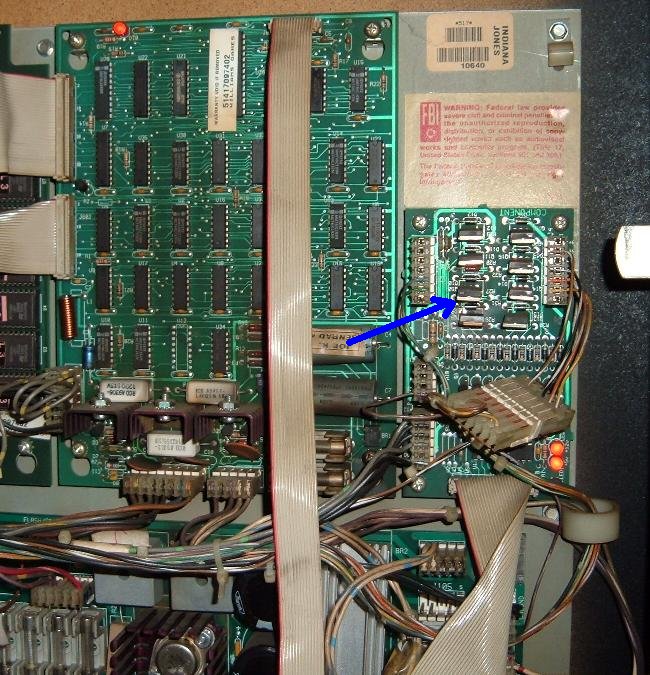
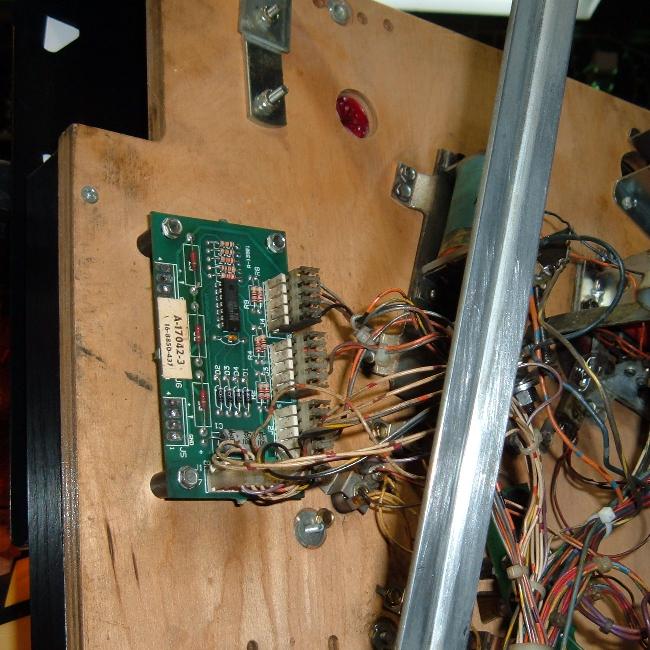
Next was to get the game at least somewhat working. Here’s a picture of the boardset in the backbox.
The original battery holder was of course corroded, so that was removed and a remote battery pack installed. (This is standard policy here at the pinball museum, all batteries need to be remotely mounted or converted to coin style batteries.)
Next up was a somewhat bizarre problem in the switch matrix. If a switch like say the right outlane was closed, two other switches would also close. (This is seen in the T.1 switch test by the way.) This is obviously not right and had to be fixed. Sometimes this is a problem on the CPU board, but after repairing a good number of Indy Jones pinballs, we had a hunch where the problem lived – under the mini playfield.
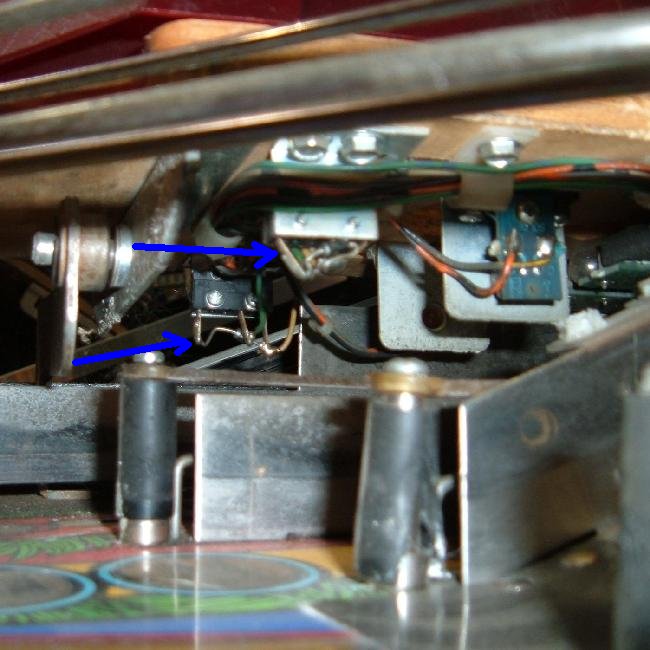
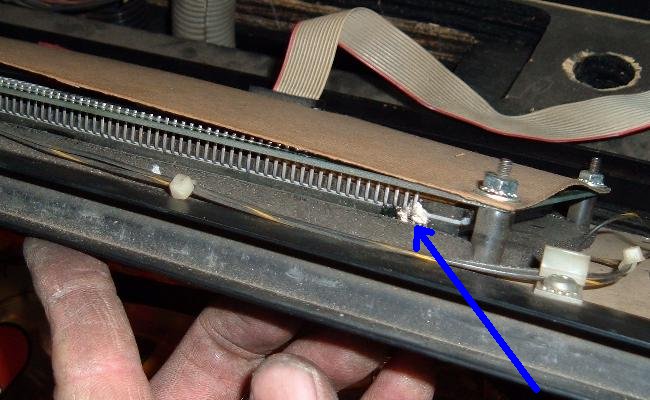
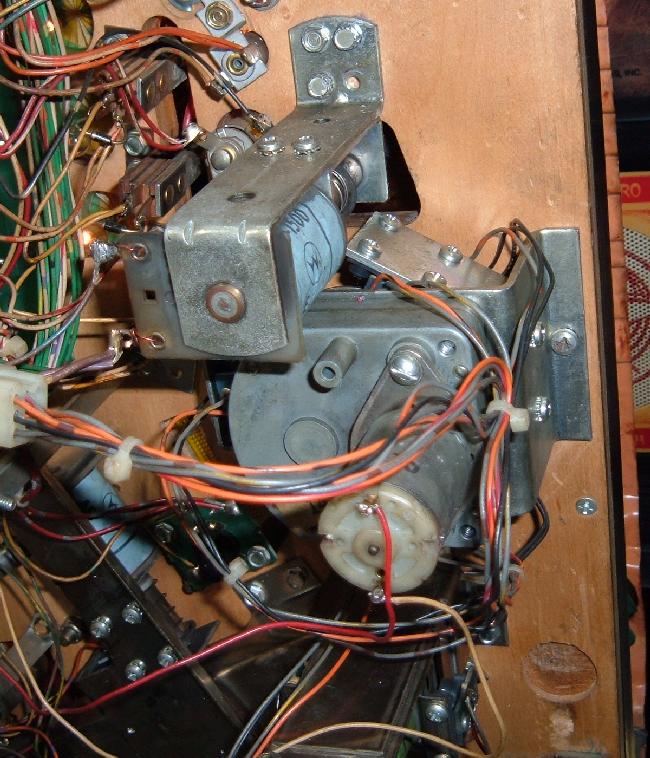
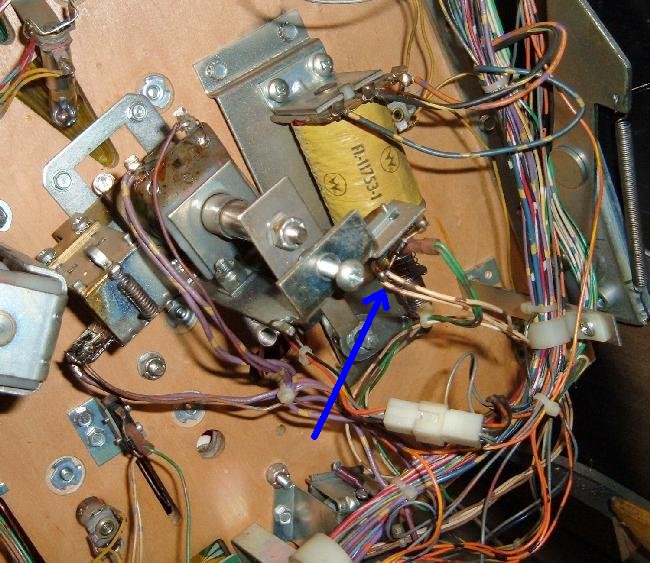
What happens is as the balls kick around (and they do kick around a lot on this game), they bounce and hit the switch leads underneath the mini-playfield (the “path of adventure”, as they call it.) You can see this in the picture below.
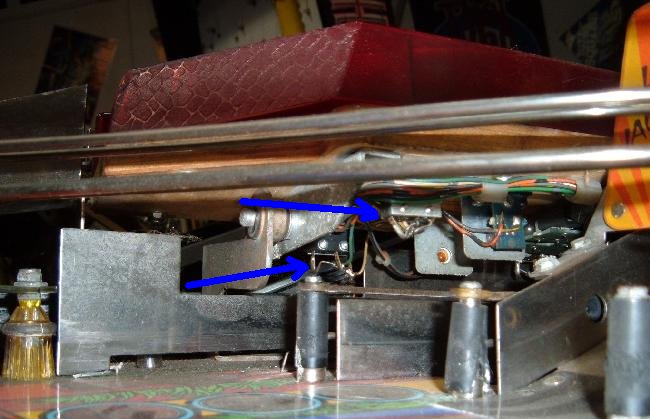
It may be a little hard to see, but the switch solder points get jammed up and short to each other, effectively removing the diode from the switch. If this happens all the switch “down river” in that row or column will trigger together. Some gentle bending of the switch legs fixes this problem, and it’s something any Indy Jones pinball owner will have to keep an eye on.
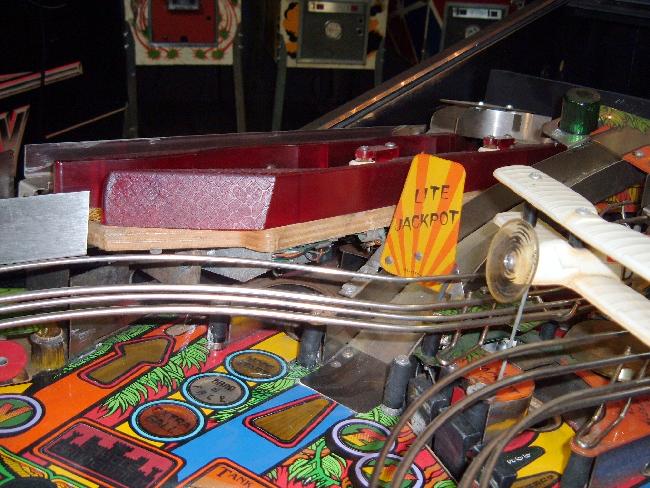
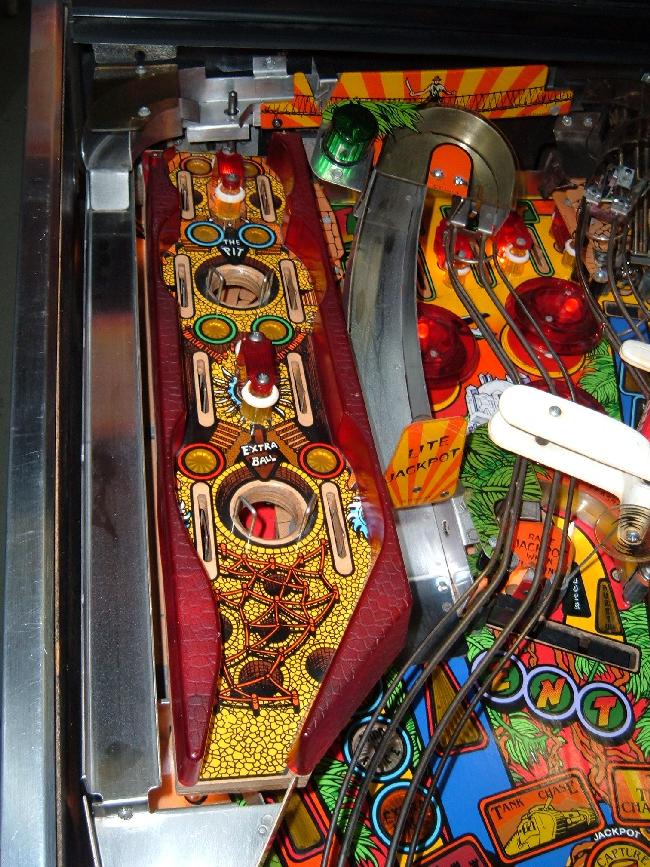
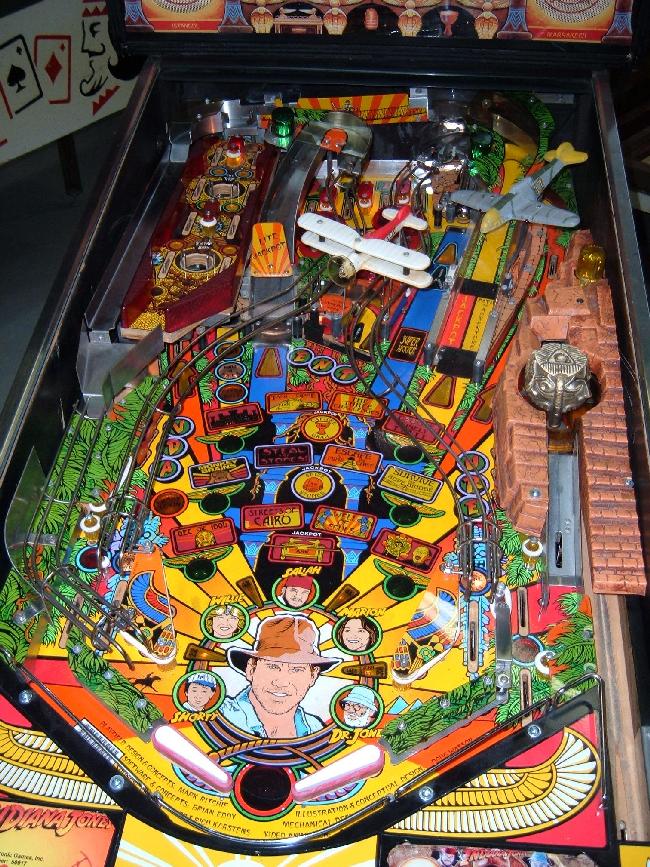
Below is a top side view of the PoA (path of adventure.) It’s a neat feature of the game, when it’s working. Speaking of which, it did pass the PoA diagnostic test, so I didn’t have to do any opto switch work to the PoA (which is pretty common on this game.)
Next up was the dot matrix display. I was getting a little frustrated with the display, as it was missing two vertical and two horizontal lines. (It made viewing the display in diagnostic more difficult.) This had to be fixed. Below is the DMD (dot matrix display) test *after* I fixed the display, showing all lines working.
The trick to getting the display working is to look at the pins. This was an older display, and used physical metal pins going from the glass to the circuit board. With game vibration, the two outside pins had broken where they meet the glass. This is really common and always happens to the outside pins. Using some silver epoxy, I was able to “glue together” the broken pins to the glass. The trick is silver epoxy, as it’s conductive. Just make sure you don’t short two pins together! (I apply the epoxy with a tooth pick.)
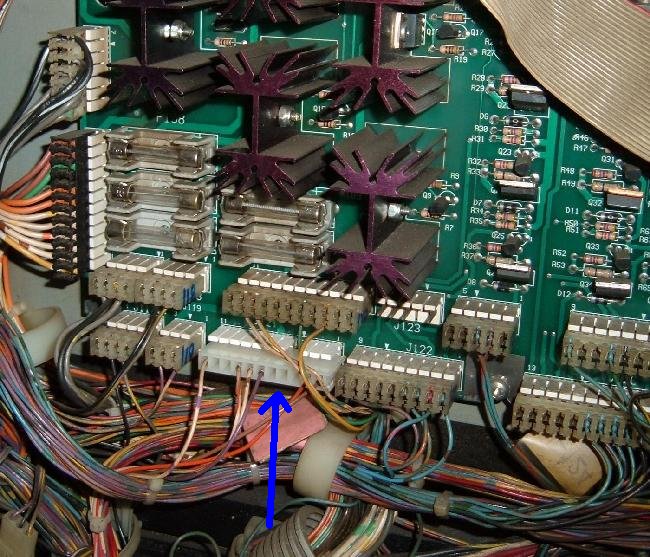
Now it was time to move to the General Illumination (GI) lighting – the lights in the backbox did not work. The reason was simple, a burnt connector. The board had new male .156″ header pins installed, and the female connector housing was replaced, and new Molex Trifurcon pins installed. Add to this that some of the backbox bulbs are not installed (to reduce connector load), and the backbox lights were now working.
Now that the game is basically working, it’s time to strip the playfield and clean all the parts. New plastic posts will be installed along with new rubber. Everything is cleaned. Note the playfield wear down by the flippers – this needs to be touched up and spot clearcoated too.
OK fast forward a couple days, and here’s the playfield all put back together. Also the wear down by the flipper has been touched up, some clearcoat added, and protective mylar installed.
One thing I didn’t notice before tearing down the playfield was the flasher bulb behind the drop target bank was “locked on.” That is, it was permanently on. Didn’t notice it before because the bulb burnt out due to this problem. On Indy Jones there’s a secondary small auxiliary driver board in the backbox that controls some flasher. One of the TIP102 transistors for this was shorted. Replaced the transistor, and this problem was gone.
Next up was another switch problem. This time the game was complaining that one the rotating idol wasn’t working right. Going to the idol test showed that there was an optic switch problem. Removed the idol from the game and test the optics, and sure enough, one was not working. That’s funny, the game didn’t have this problem before I tore down the playfield for cleaning, did I do something to break it?
The optic idol switches are controlled by a small under-playfield mounted board. This has an LM339 chip that can go bad. Or have bad connectors to the board. But none of these things checked out. Continuity from the idol to the board was good, and the LM339 chip tested good with the DMM. Something wasn’t adding up here…
Looking at the manual I noticed the non-working optic switch had a white/brown row wire. For giggles I tested some other switches in that row, and found they were not working either. Ha progress! Following all the switch, I found the one at the single drop target where the white/brown wire was broken. Connected the wire, and now all the switches worked, including the idol optic switch.
Noticed that the drop targets in the 3-bank were sluggish. Took them apart and cleaned off all the old grease. These don’t need to be lubricated by the way. Decided to just replace the nearly 20 year old targets anyway, because you know the old ones will break!

Last up was the ball trough. Sometimes the balls would not roll down to the vertical upkicker (VUK), thus no ball would get delivered to the shooter lane. Usually this is a problem with “divots” in the metal, that prevents the balls from rolling forward. Took the ball trough out and filed out the divots. Then polished the area smooth. Put it all back together but the balls were still hanging up. What the heck?? It turns out the problem was someone installed the VUK’s coil sleeve reversed. So the coil sleeve was actually preventing the balls from rolling through the trough. Repositioned the coil sleeve correctly, and that problem was now fixed. Also installed rubber grommets to hold the boards to the metal trough. This is a good idea as vibration can damage the boards.

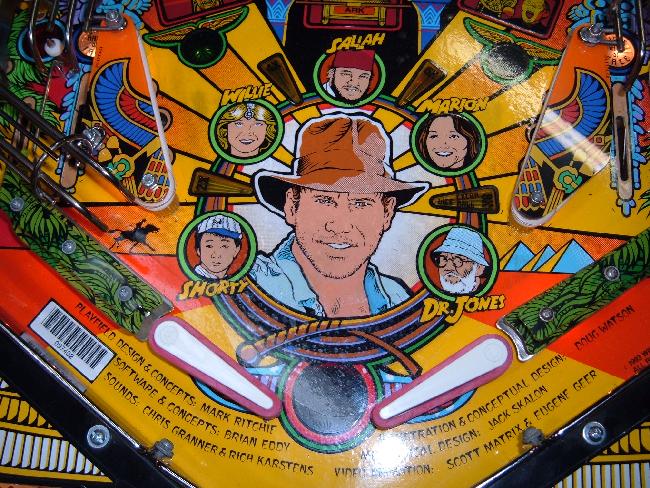
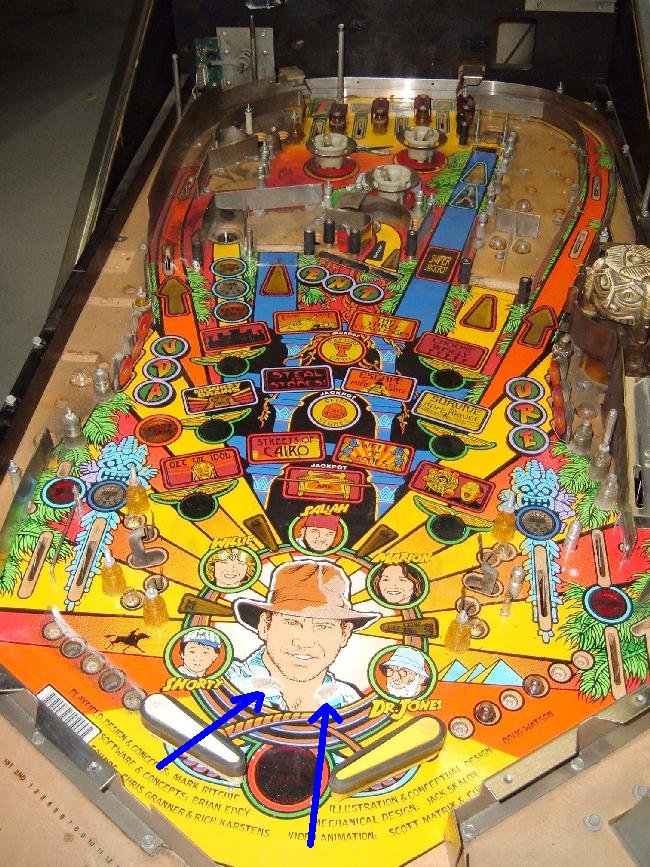
Now the game was really all working and ready for play! Below is a picture of the touch up done to Indiana Jones. He had some wear, but it’s all gone now.