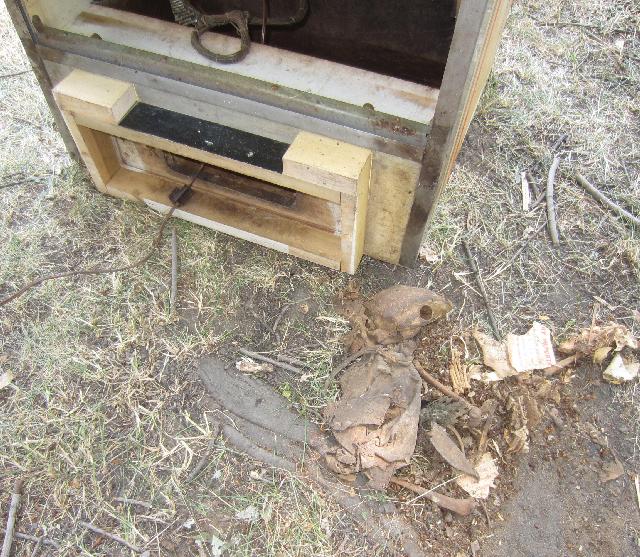
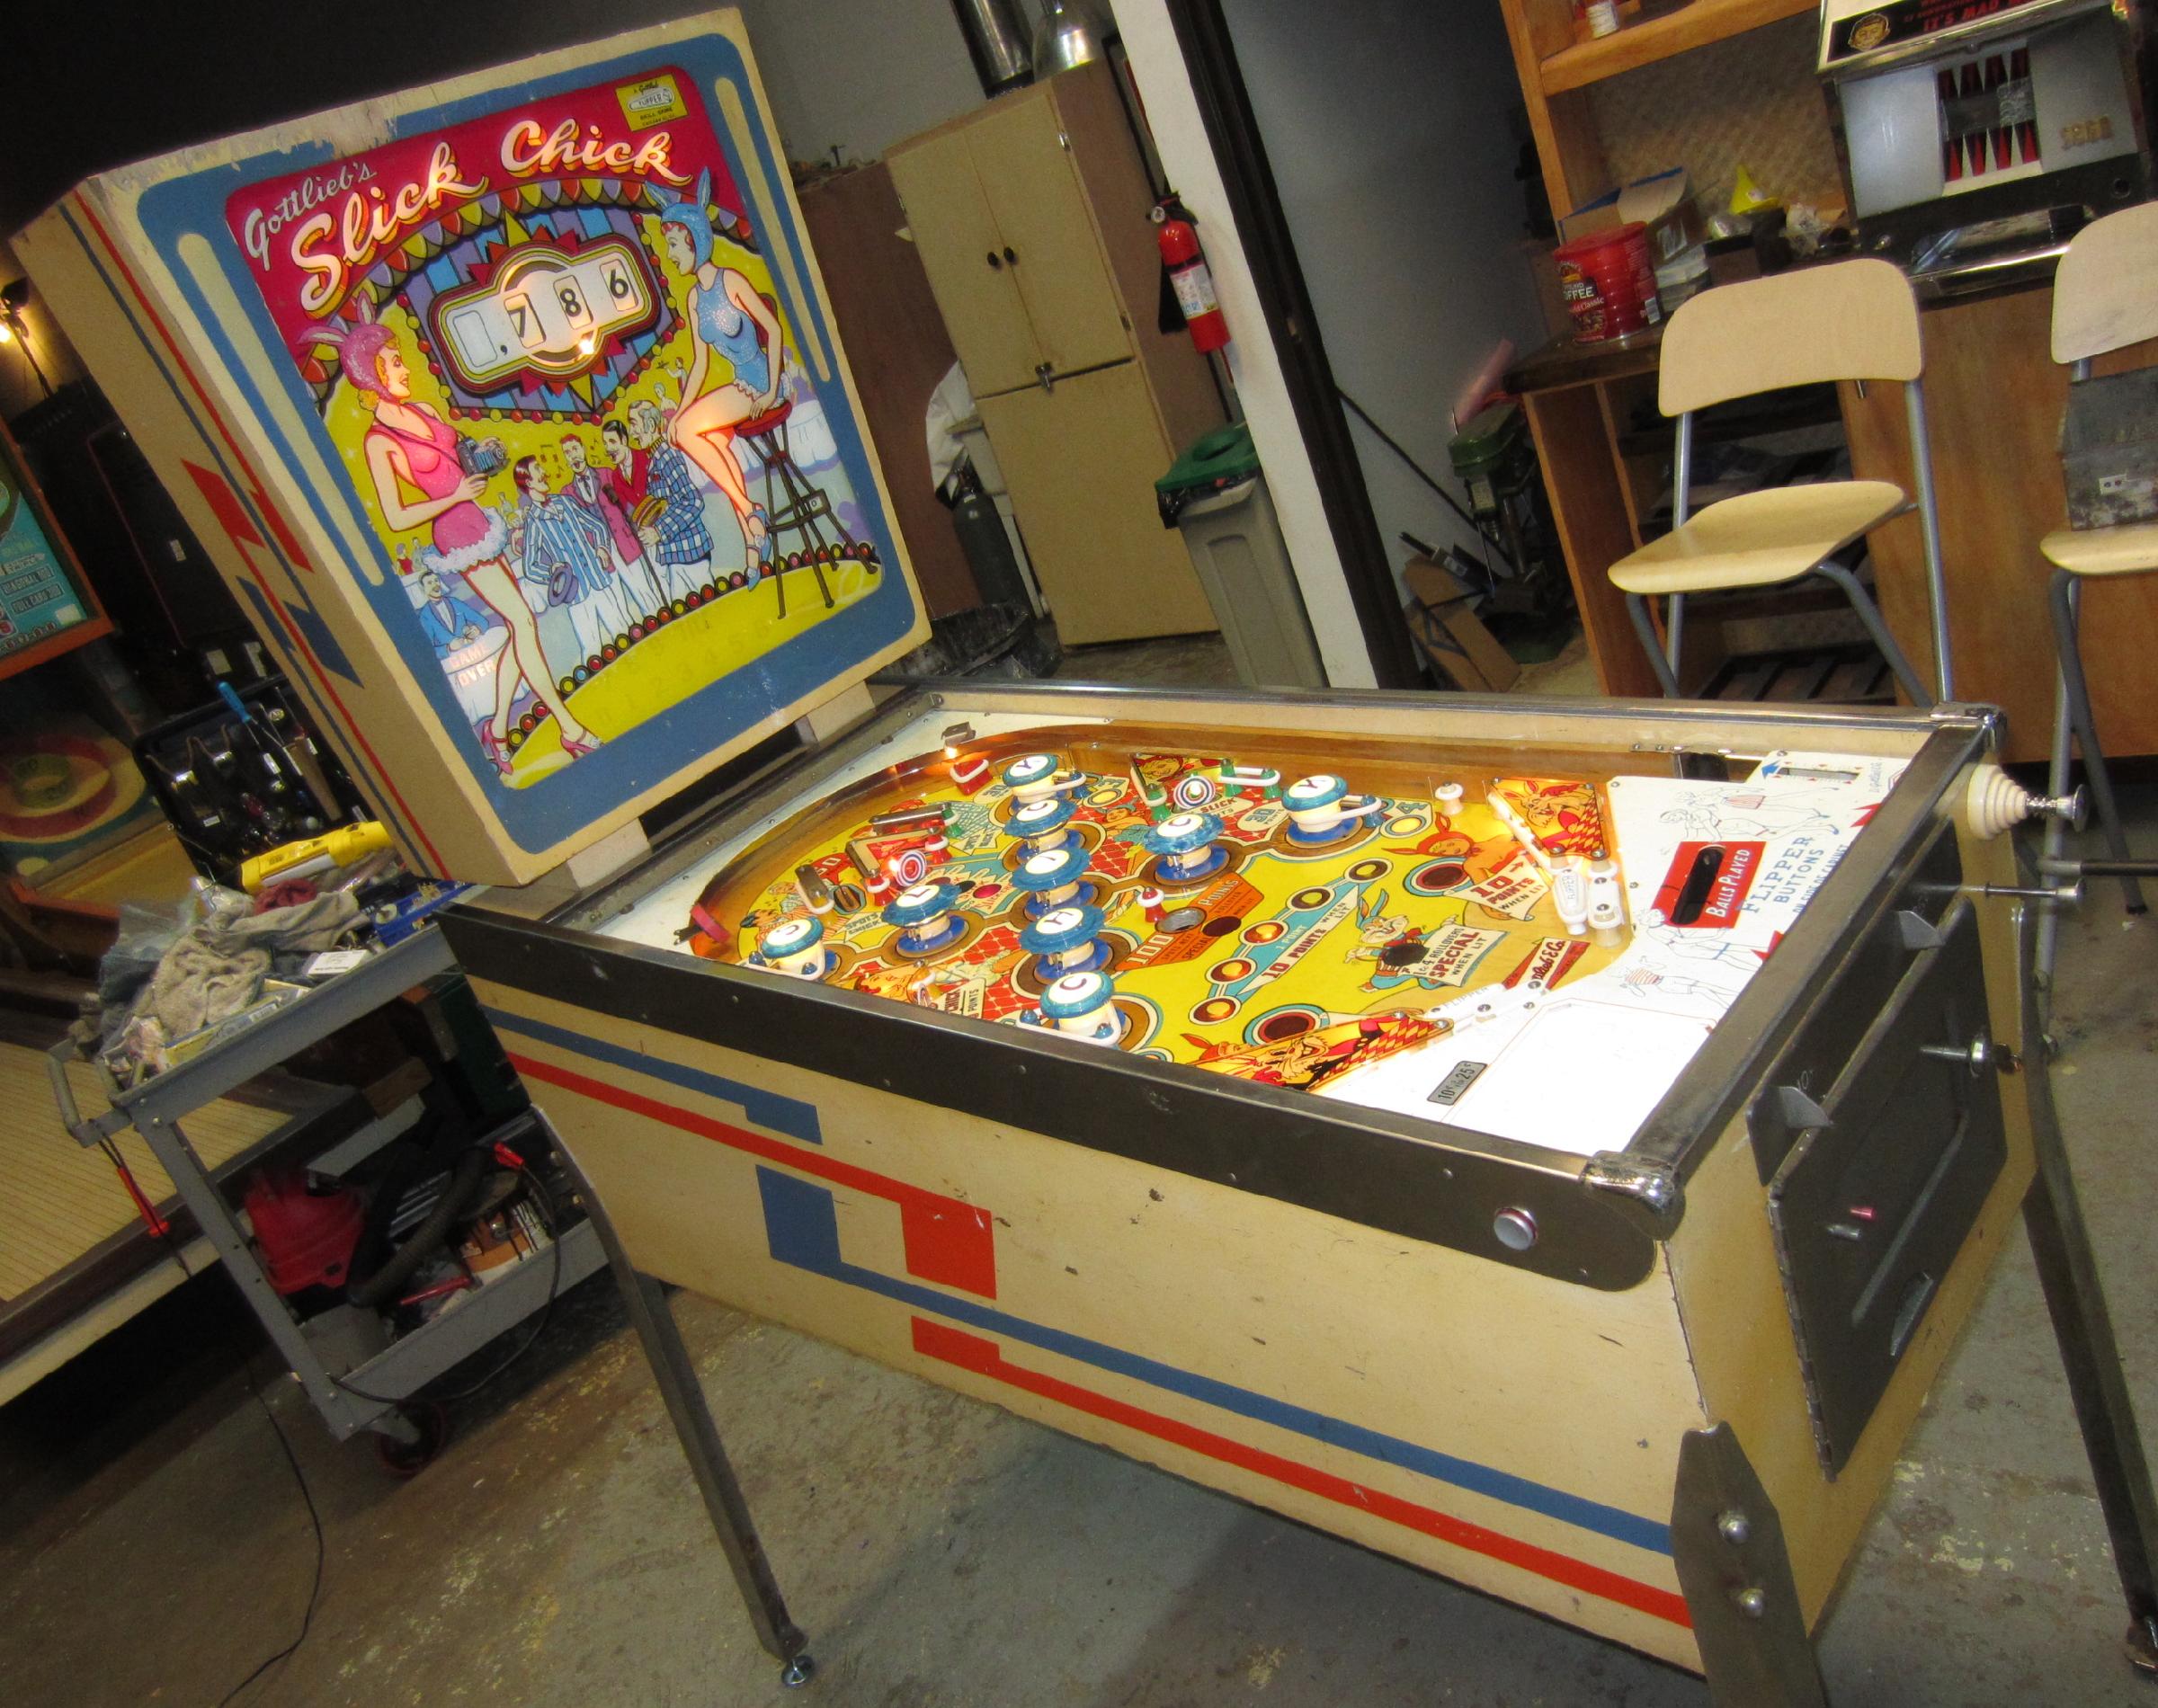
There was recently a game auction in Carleton, Michigan that we attended. We knew about this situation – the owner was an game operator that died in 1980. He had all his games (well over 100) in a pole barn outside his rural house. The problem was, after he died, the widow did nothing to maintain the pole barn. Animals had gotten in (raccoons mostly), and created all sorts of damage to the game. If a game didn’t have a back door or a top glass, they pooped right on the playfield! Unfortunately for the 1963 Gottlieb Slick Chick pinball here, not only did they do that, but one crawled inside and died! We bought some games from the widow last fall, kind of cherry picking what we wanted, but she died over the winter 2011/2012. Fast forward to the summer of 2012, and we bought this game at the family’s property auction. Can it be restored? Sure it can, and we’ll do it! Because we must repair and restore this 1963 Gottlieb Slick Chick pinball.
First I should mention that here at Michigan Pinball’s Detroit Pinball Collectors Club, I should toot some horns first. We don’t just repair games, we can do a whole lot more, the entire 9 yards, as they say. Let’s face it, there’s lots of people that can fix machines (be it old Electro-Mechanical EM pinballs, or current Solid State pinballs.) But we do a lot more than that, and this game is the perfect example. Not only did we get the game working perfectly, but as documented here, we restored the playfield with touch up and clear coat (for future protection.) We have all these skills in our membership that allows us to do this type of intense work, and we’re rather proud of it. Everything is done “in house” and in a timely manner (this whole repair/restoration took about 10 days total.) Most of this work falls onto the shoulders of one person, but in this case, a couple others chipped in to make the project a real success. That’s what makes a pinball club good, is having members with different skill sets, and their application of their skill when needed!
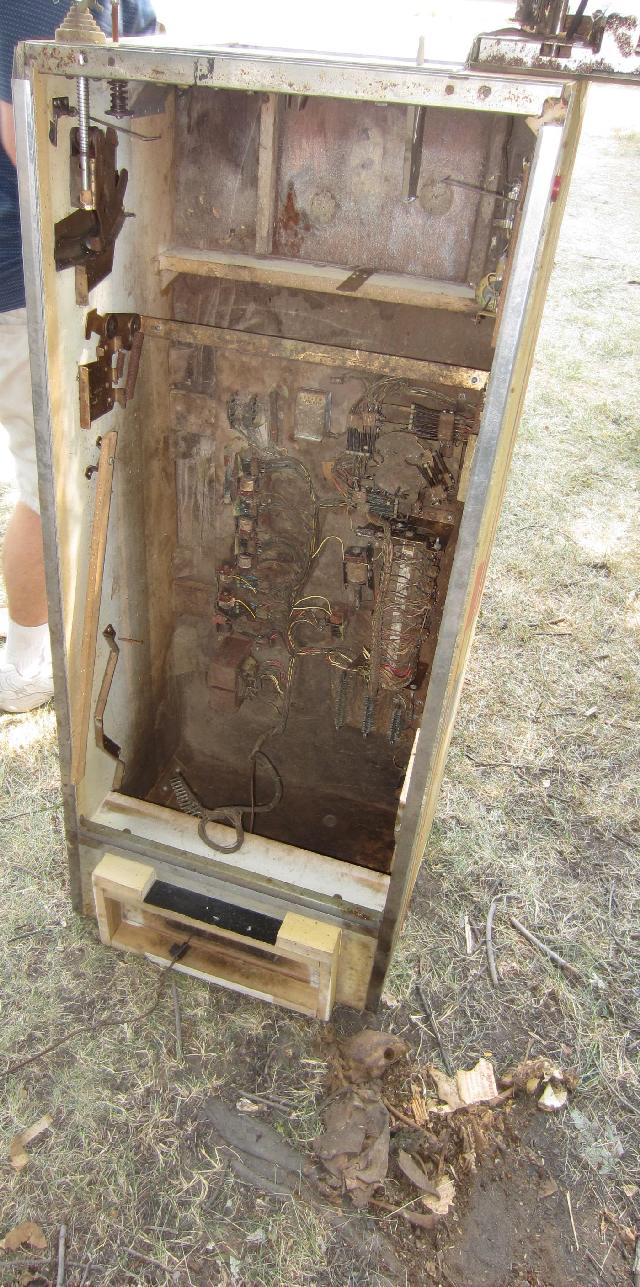
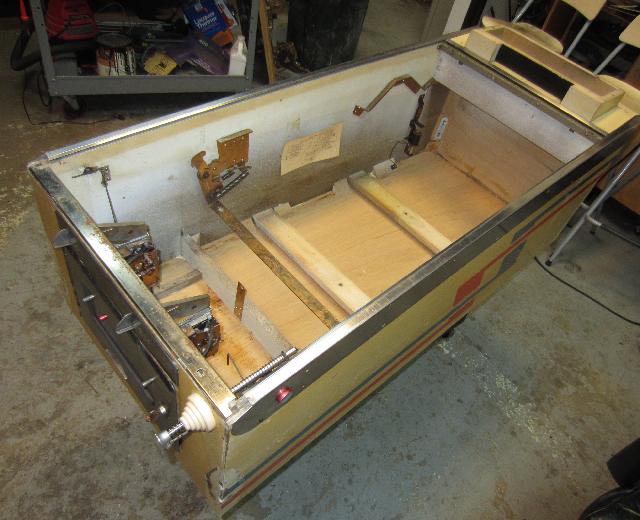
But on to the project at hand, our 1963 Gottlieb Slick Chick pinball, which was stored poorly in a bad barn and forgetten for 30+ years. The first trick was to get the game empty of animal parts and poop. We did this at the auction site before loading the game into the truck. Then we the game was at the warehouse, it was time to completely disassemble the cabinet. A new bottom had to be installed in the game, or it would forever smell like raccoon pee. We removed the bottom mechanical panel too, took off all the parts, bleached it, power washed it, and then re-assembled. Cleaned up the exterior metal parts too. First misson accomplished!
It’s really amazing how things can clean up with some bleach, a brush, and some new bottom wood. That nasty smell is gone! I mean I don’t suggest eating off of the bottom of the game, but we’re well on our way to making this a respectable machine.
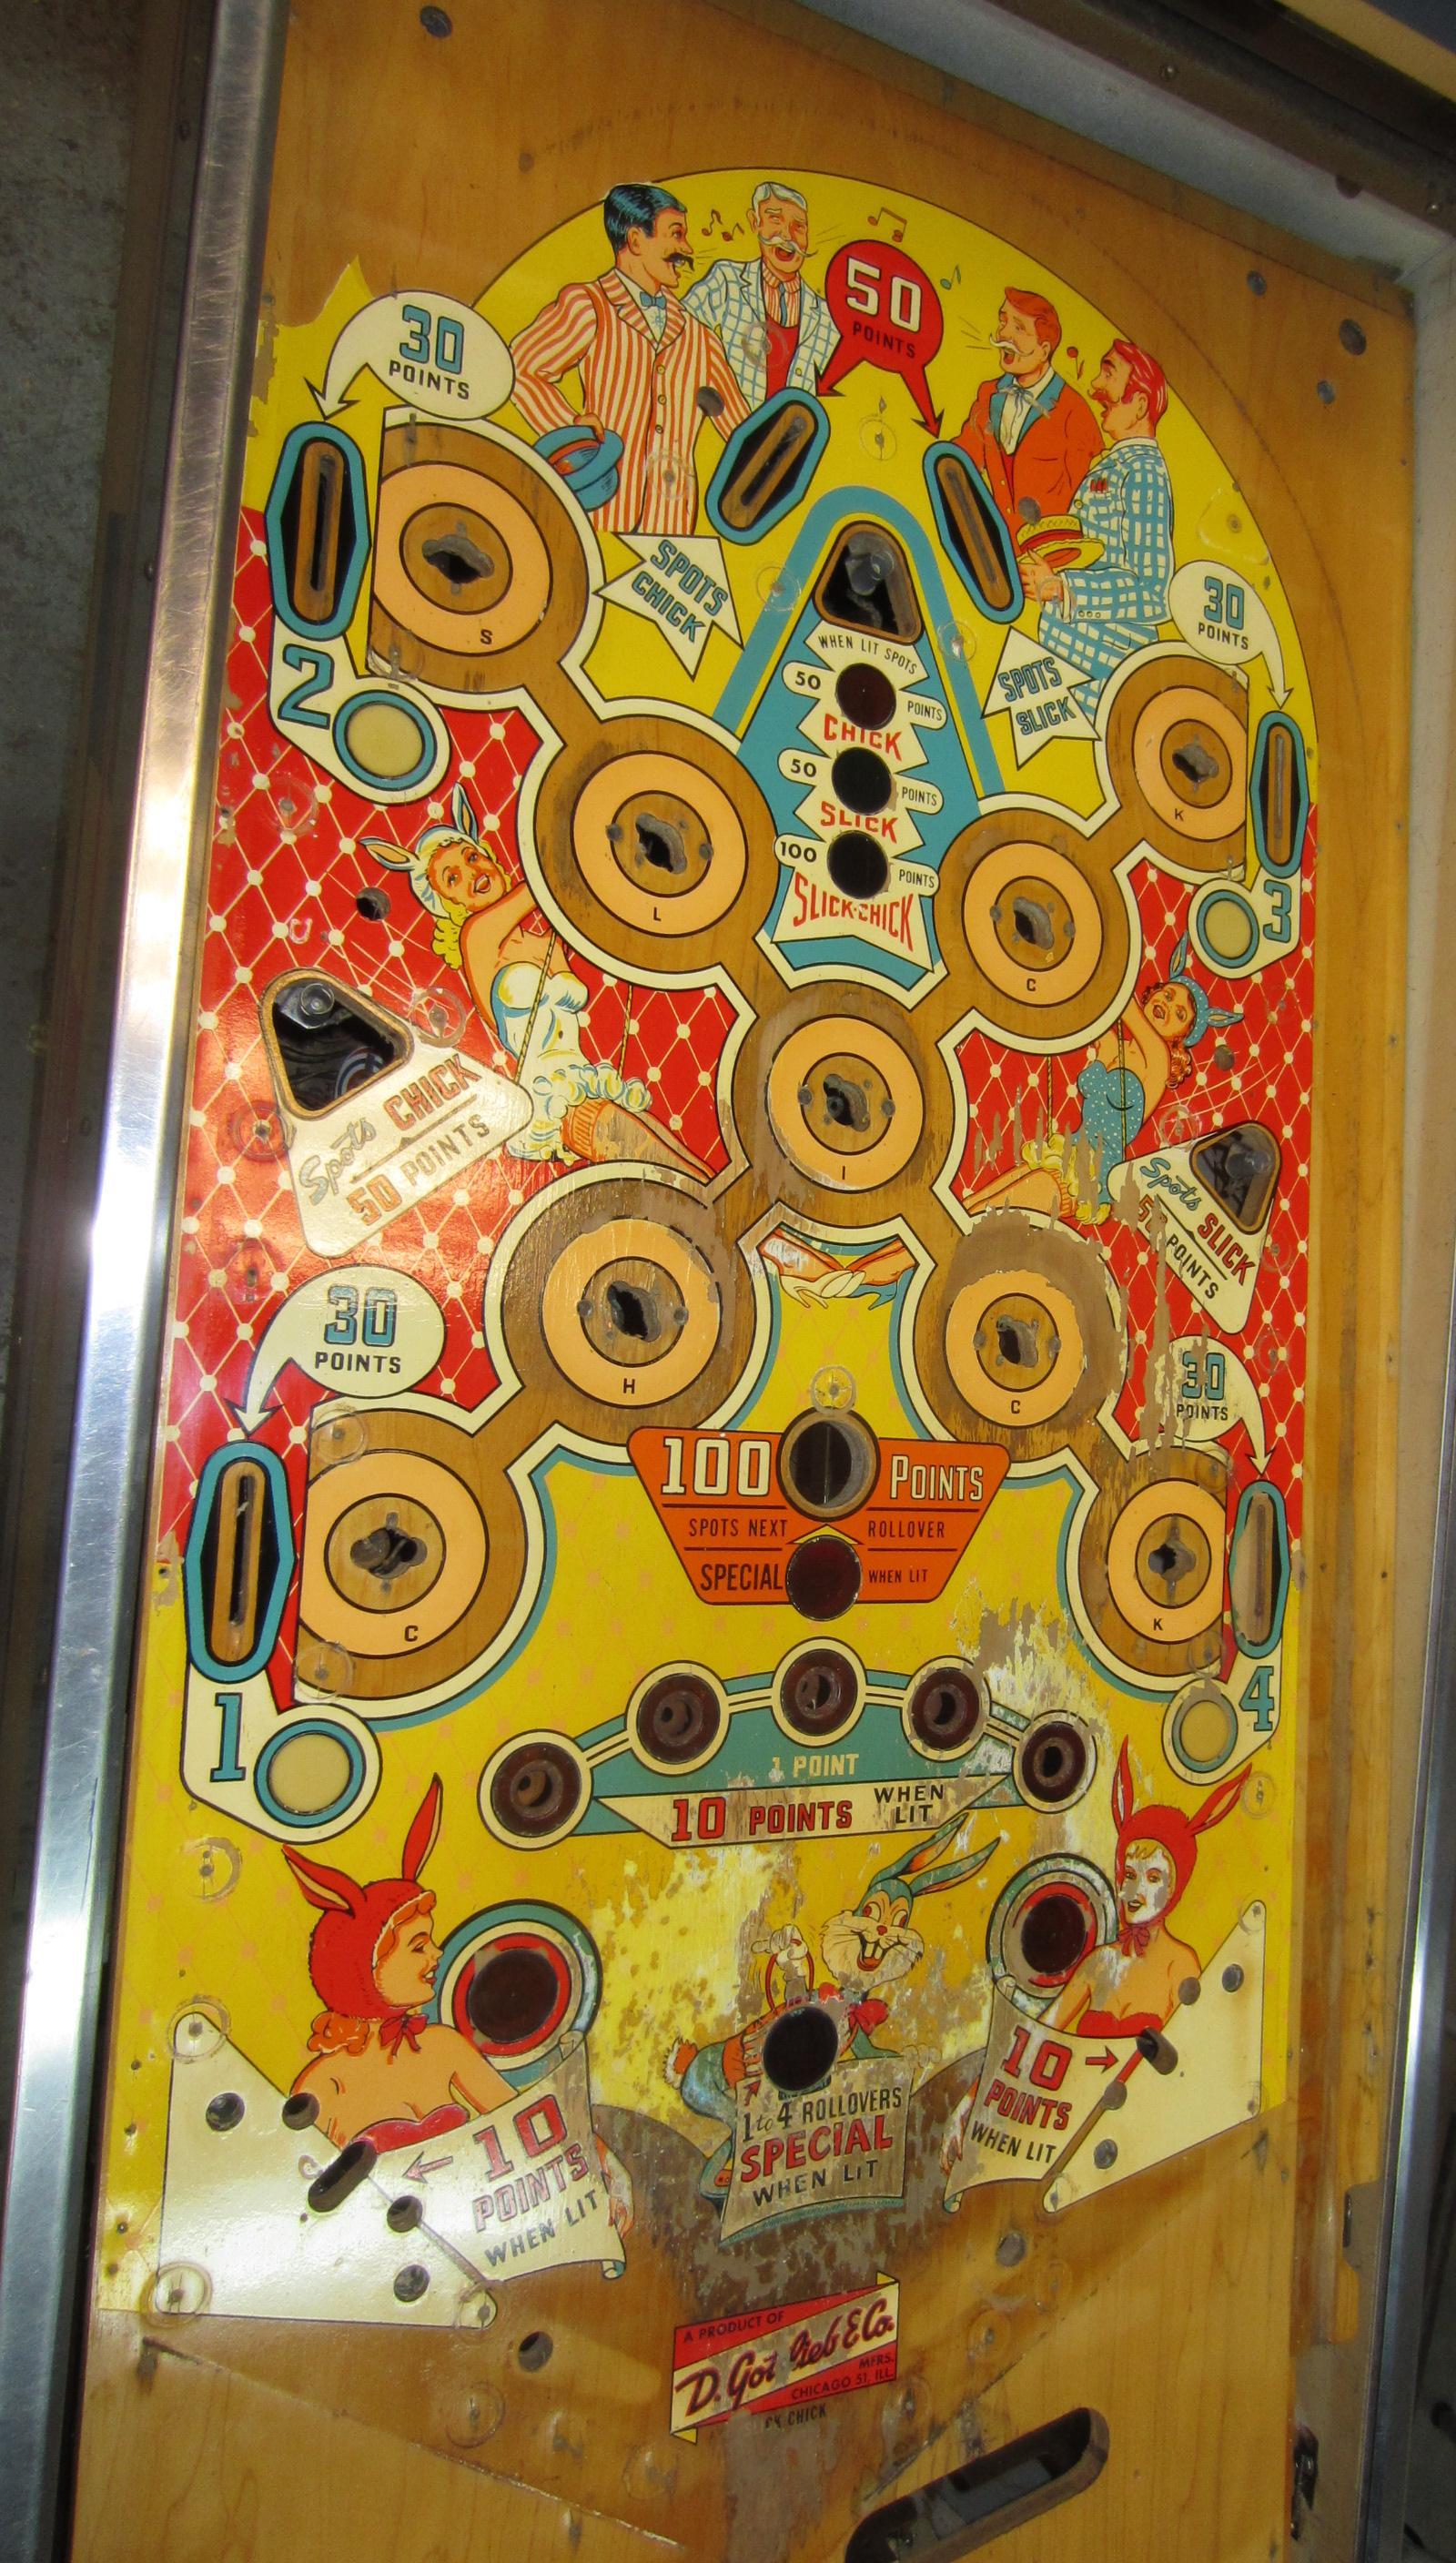
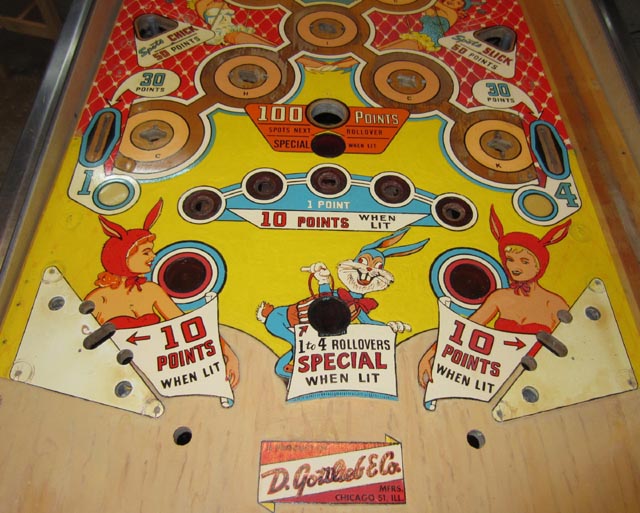
After some mechanical work (actually, A LOT of mechanical work!), the game was up and running. That was the easy part frankly. Now what to do with the playfield? The animals had damaged not only the artwork around the flippers, but also the wood itself (which was almost black from there indiscretions.)
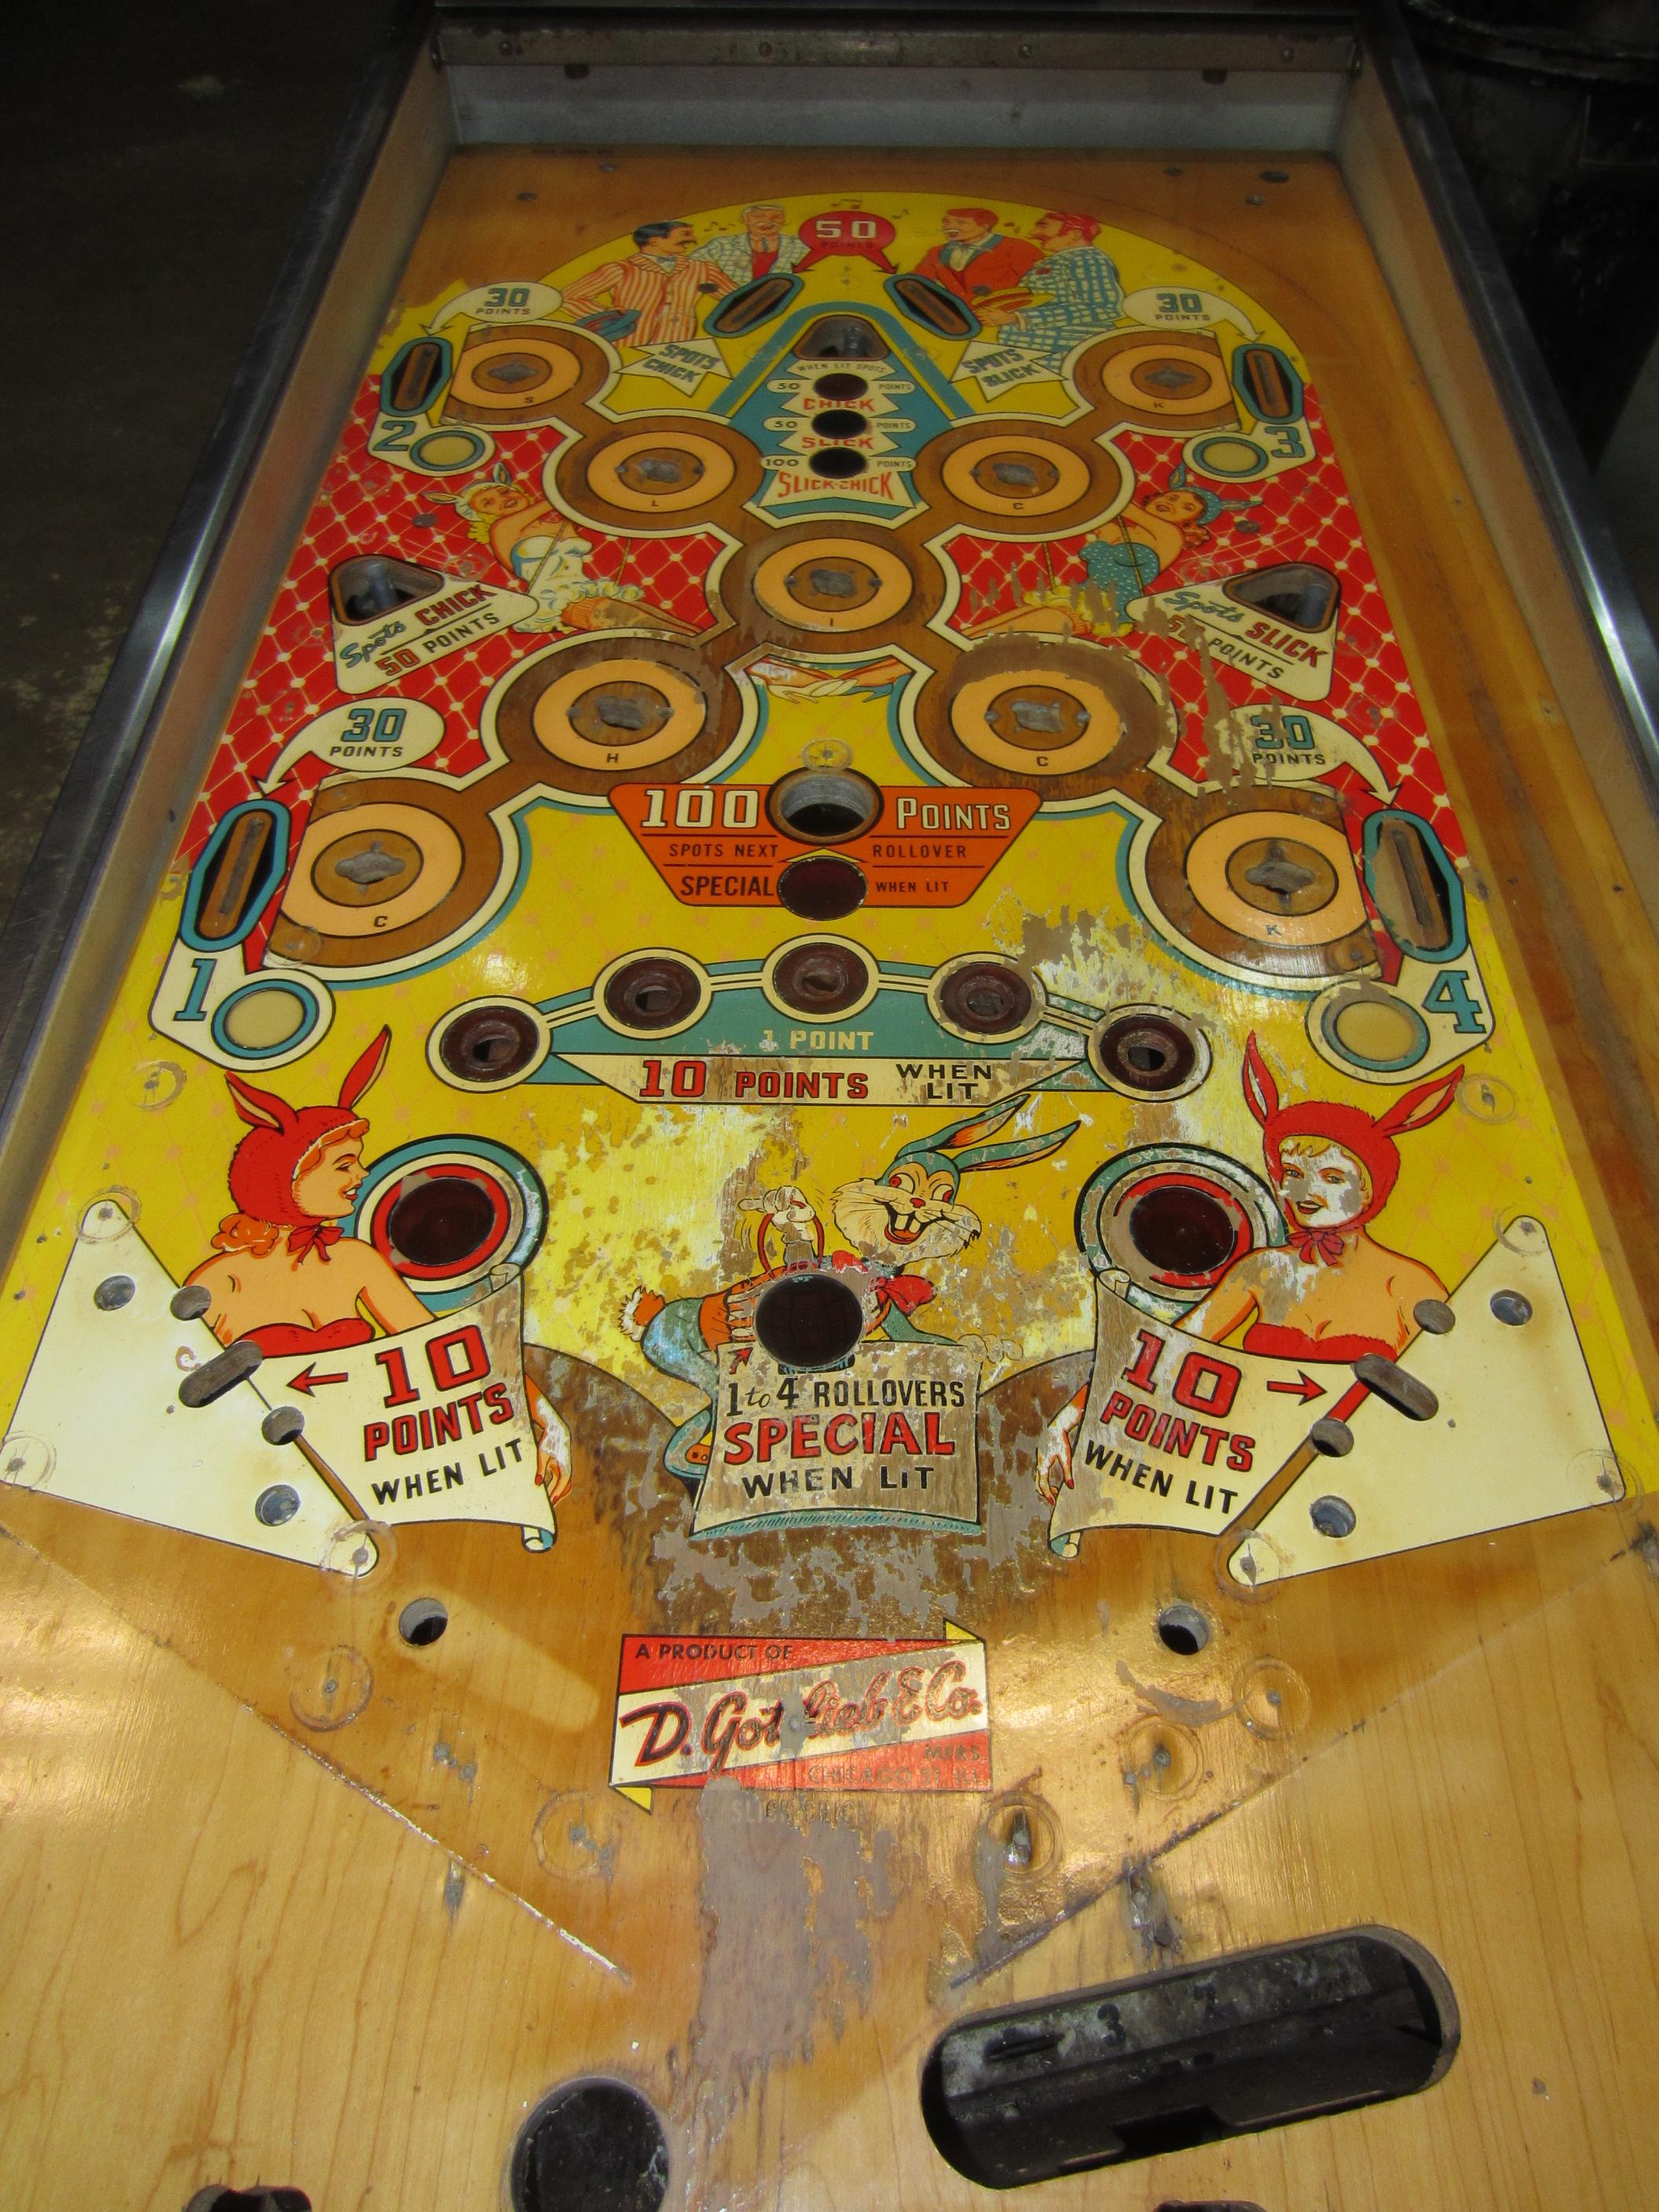
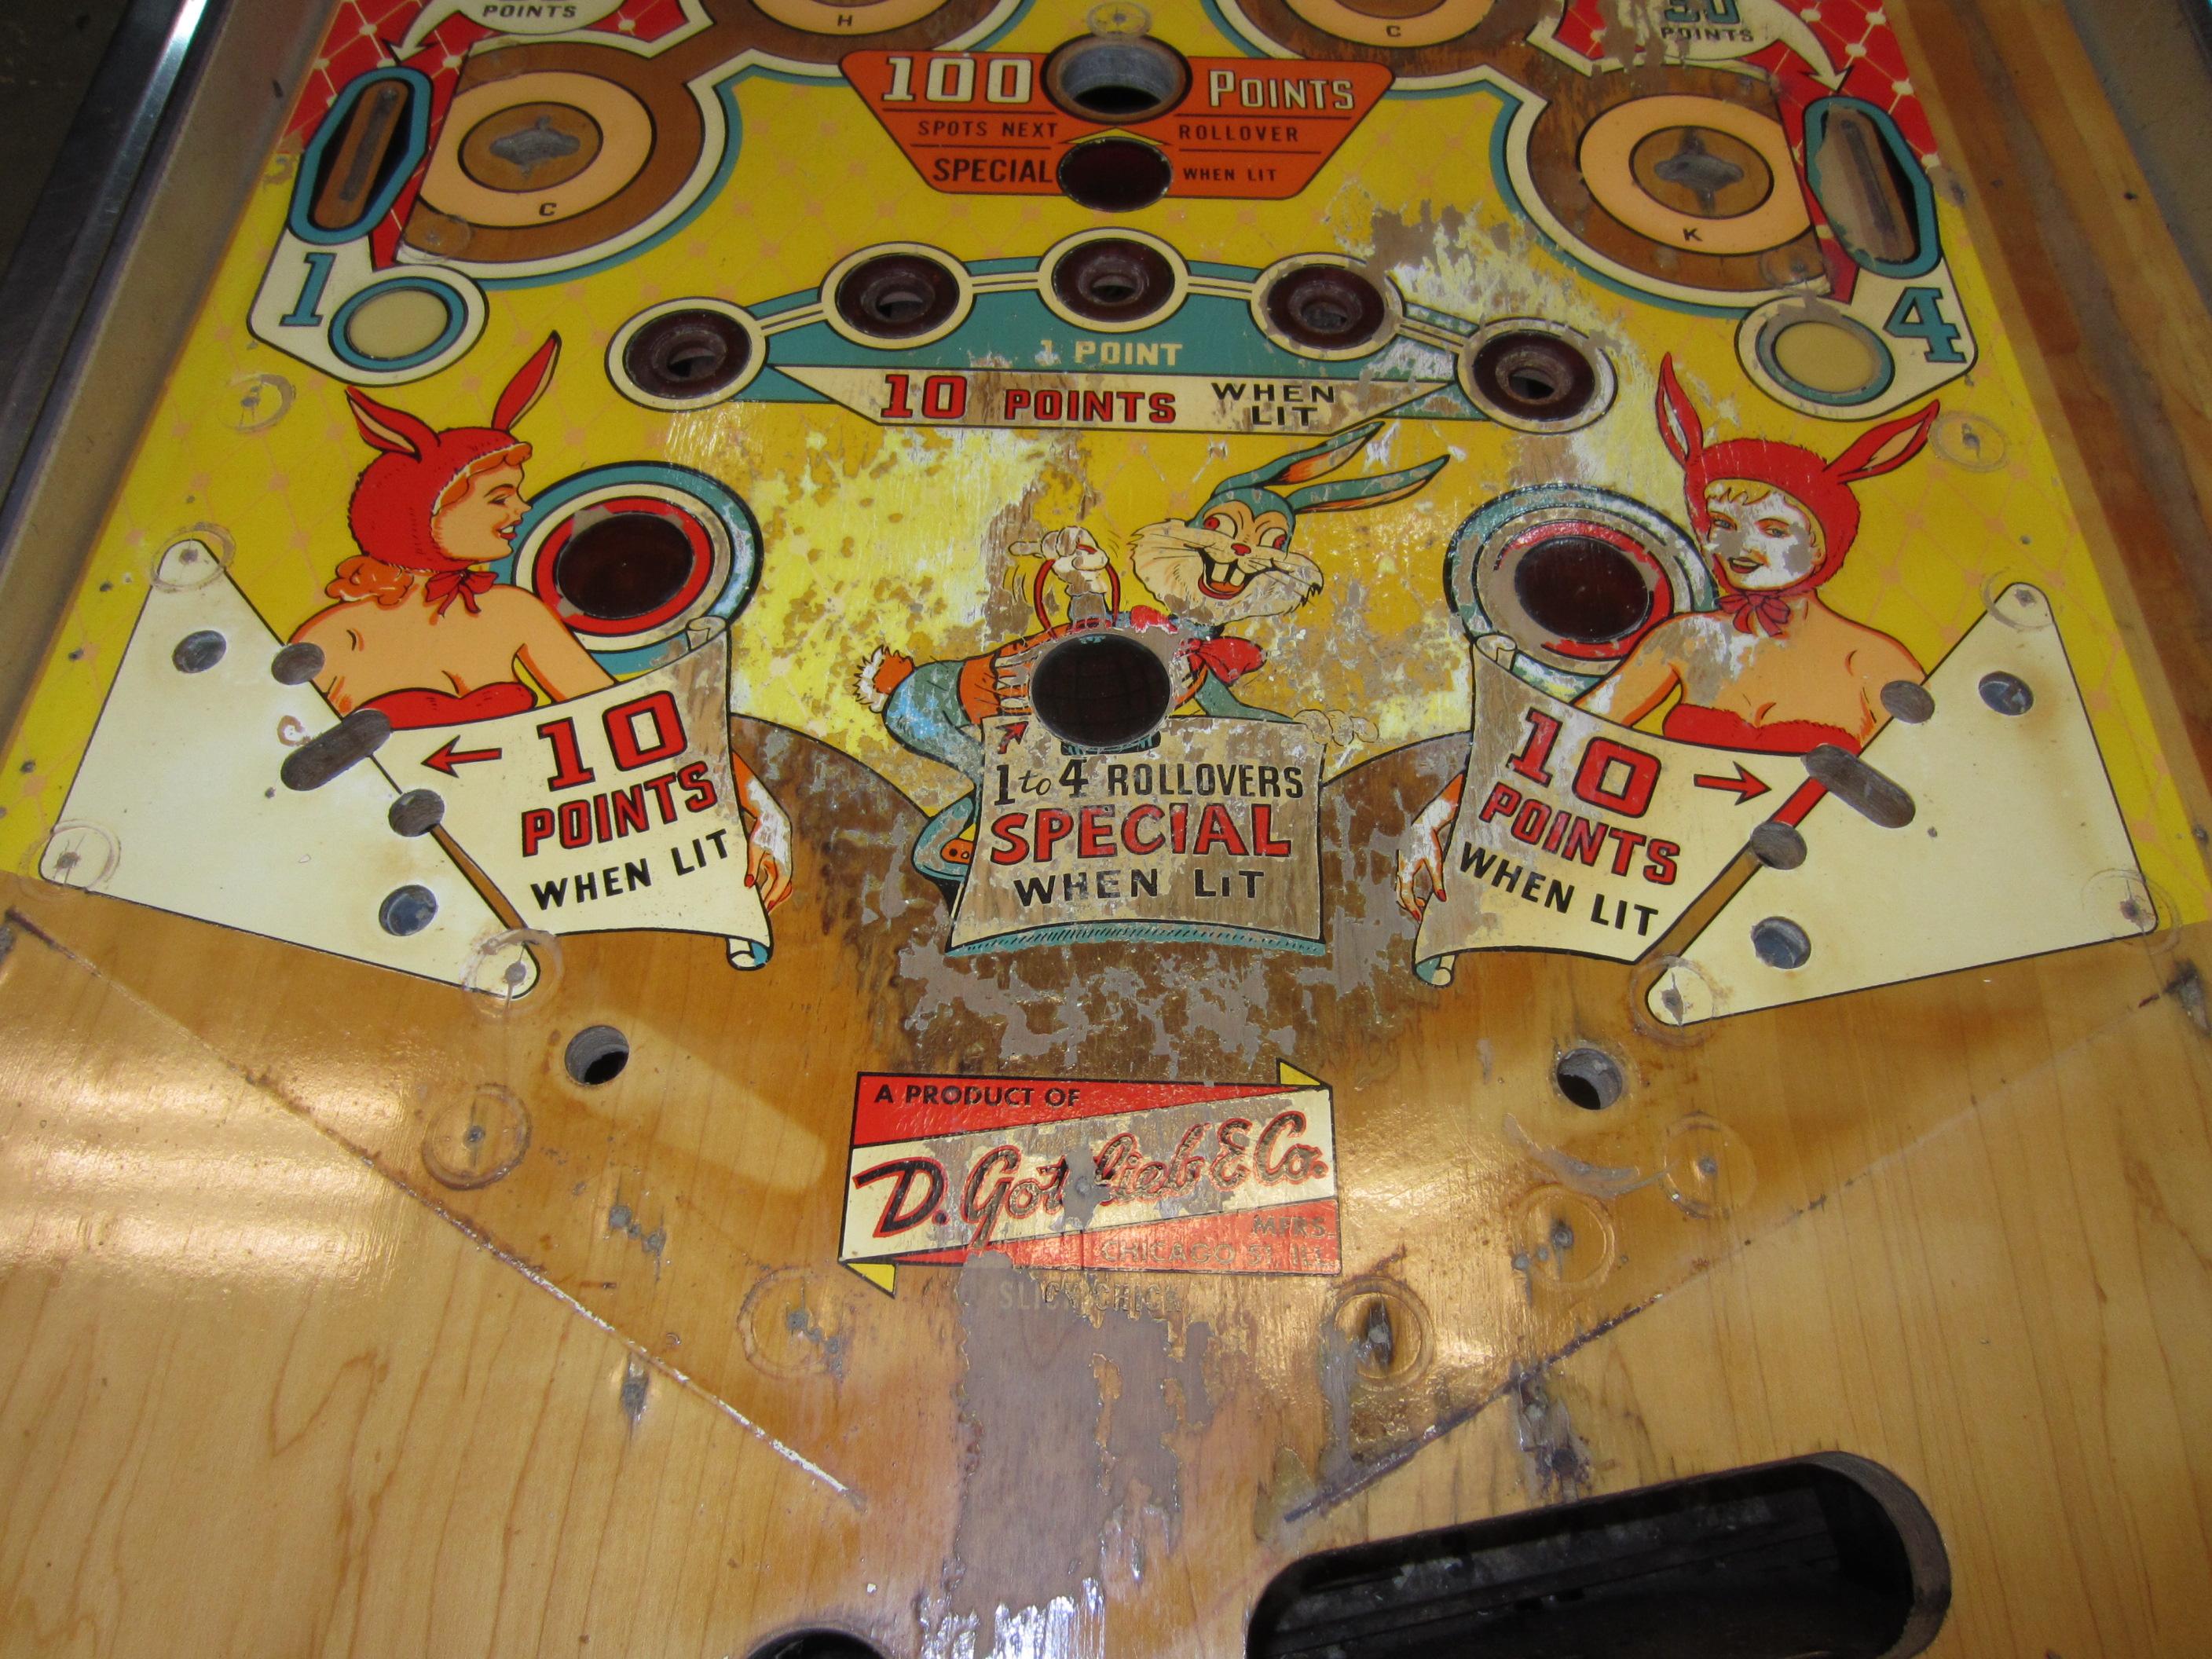
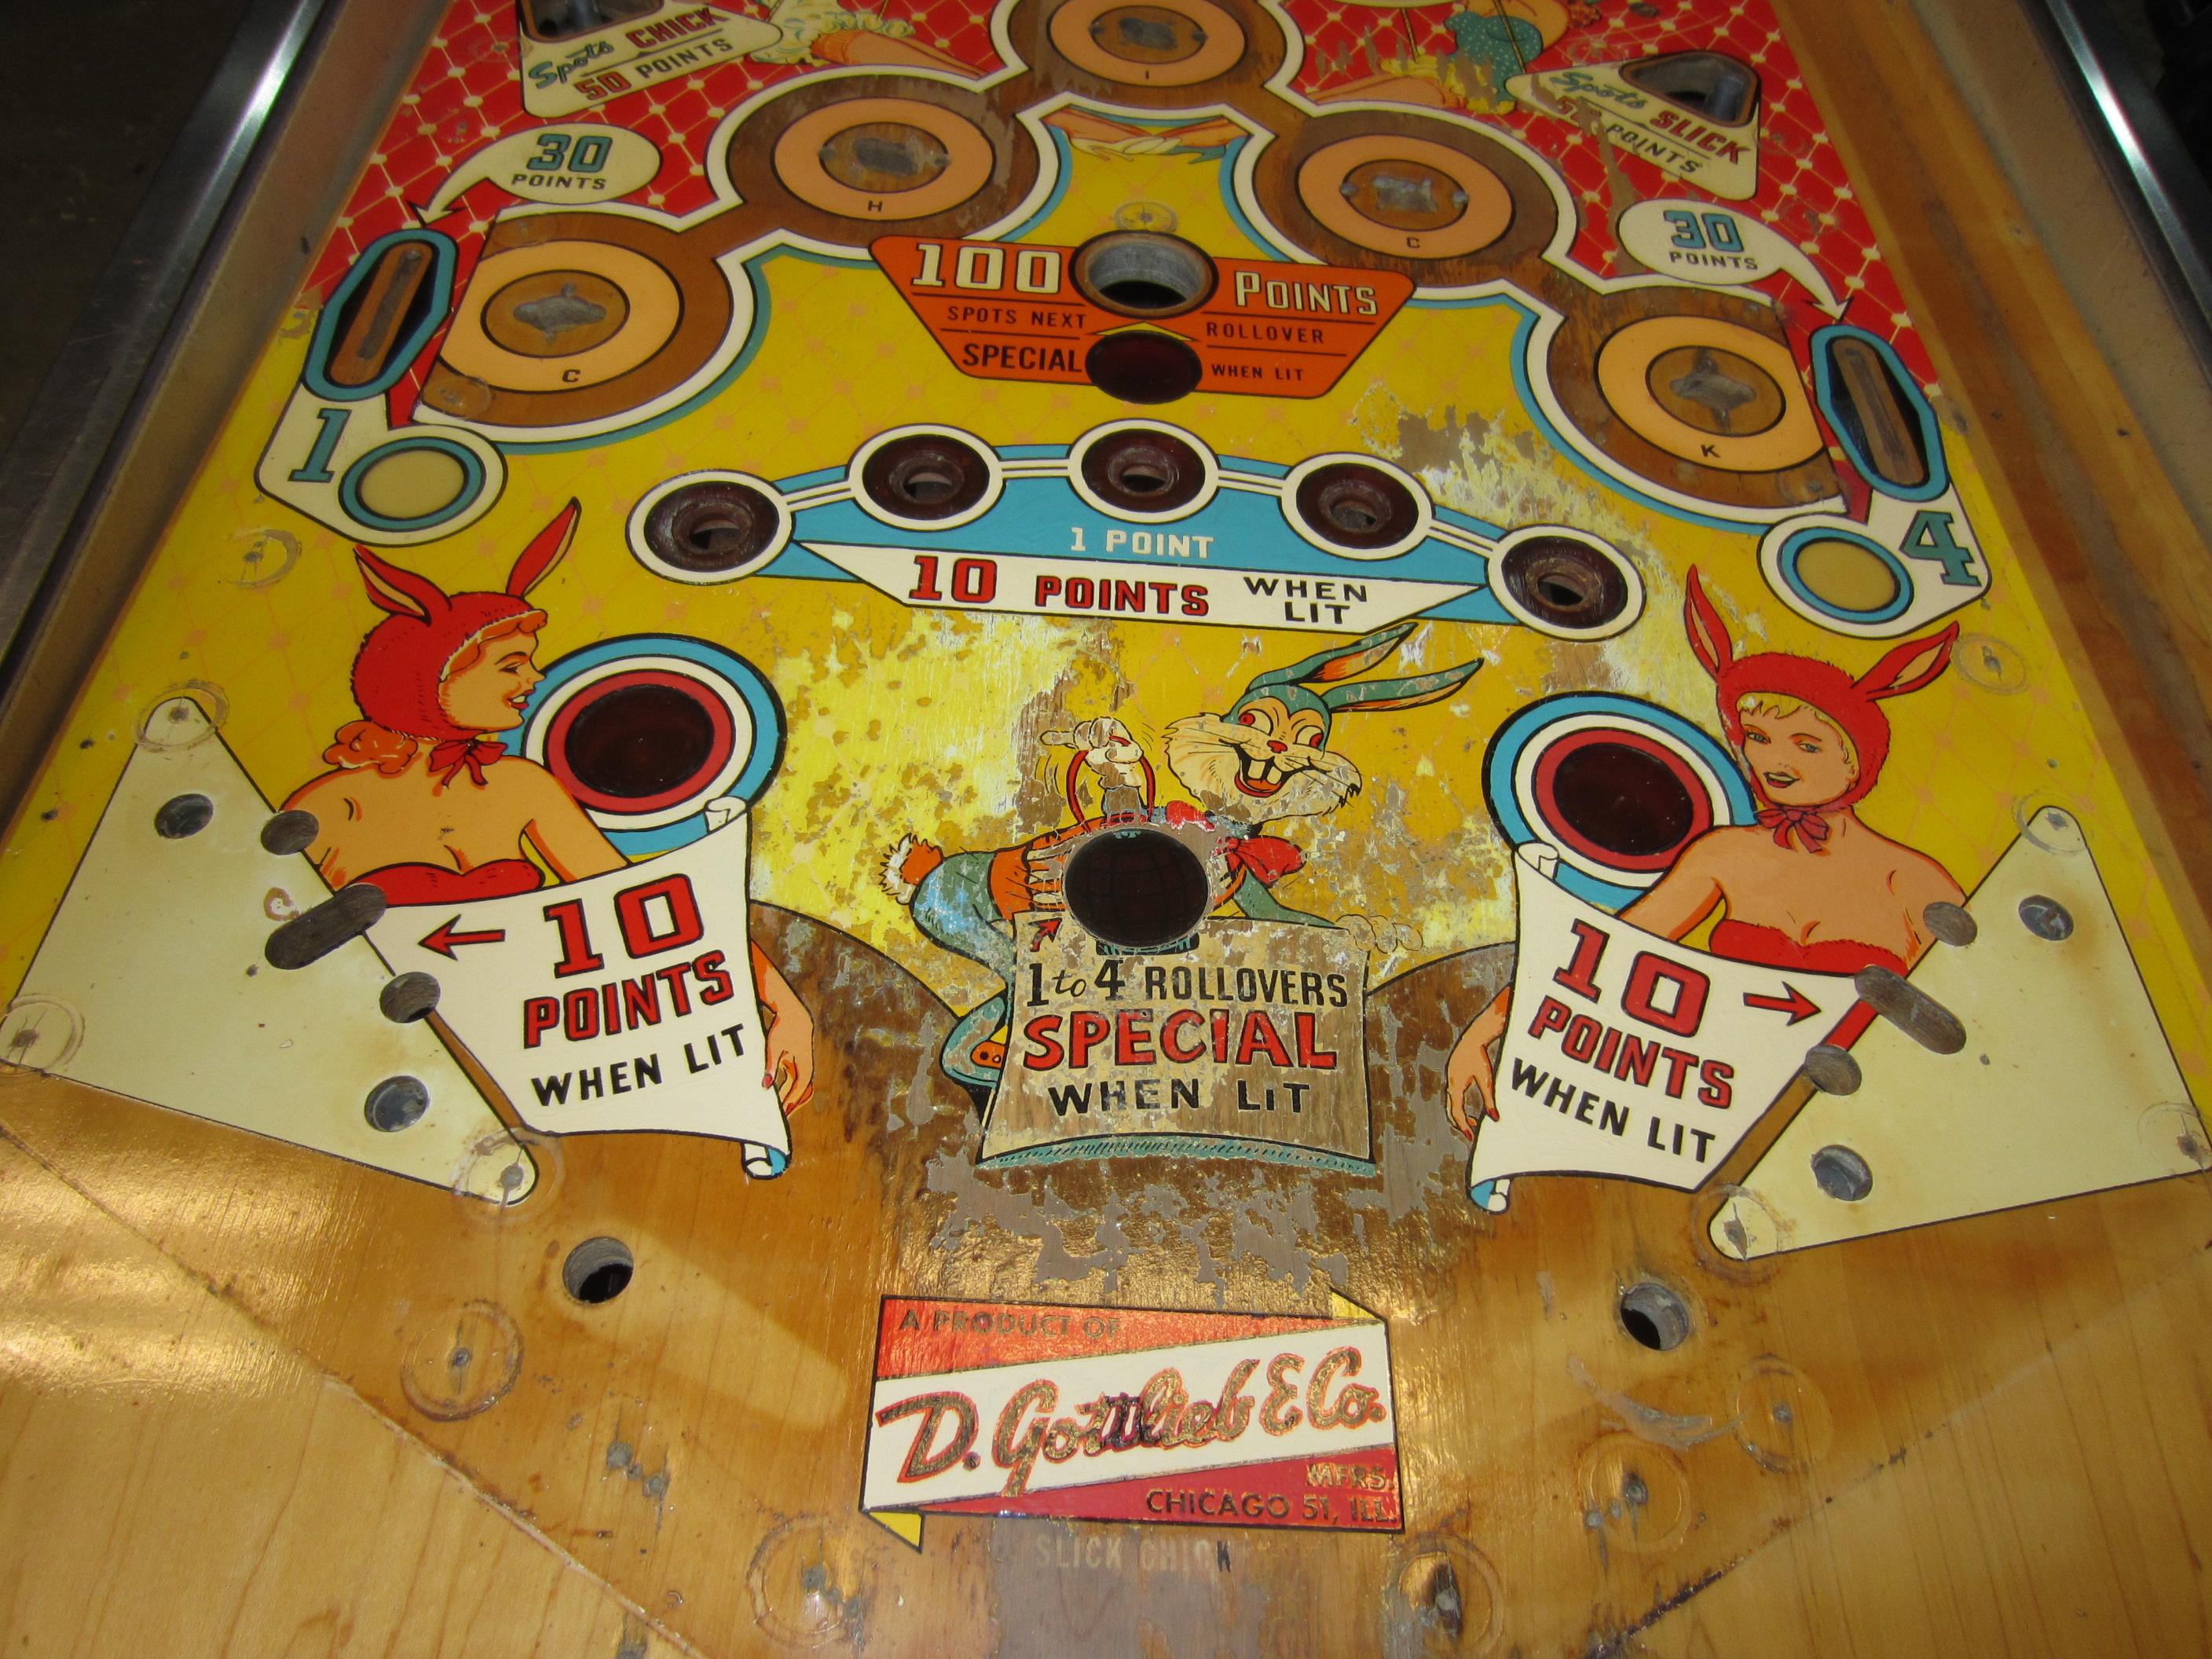
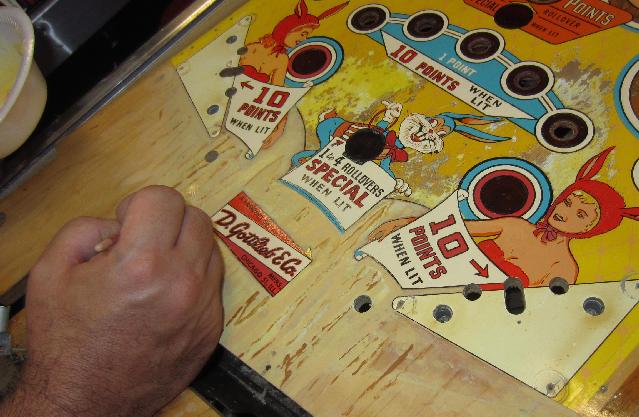
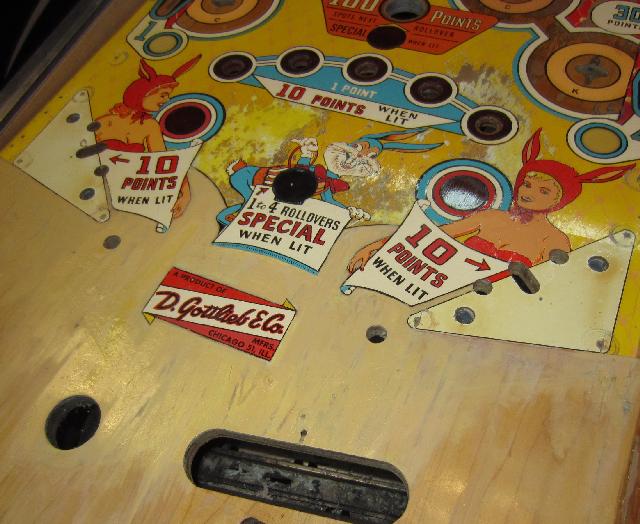
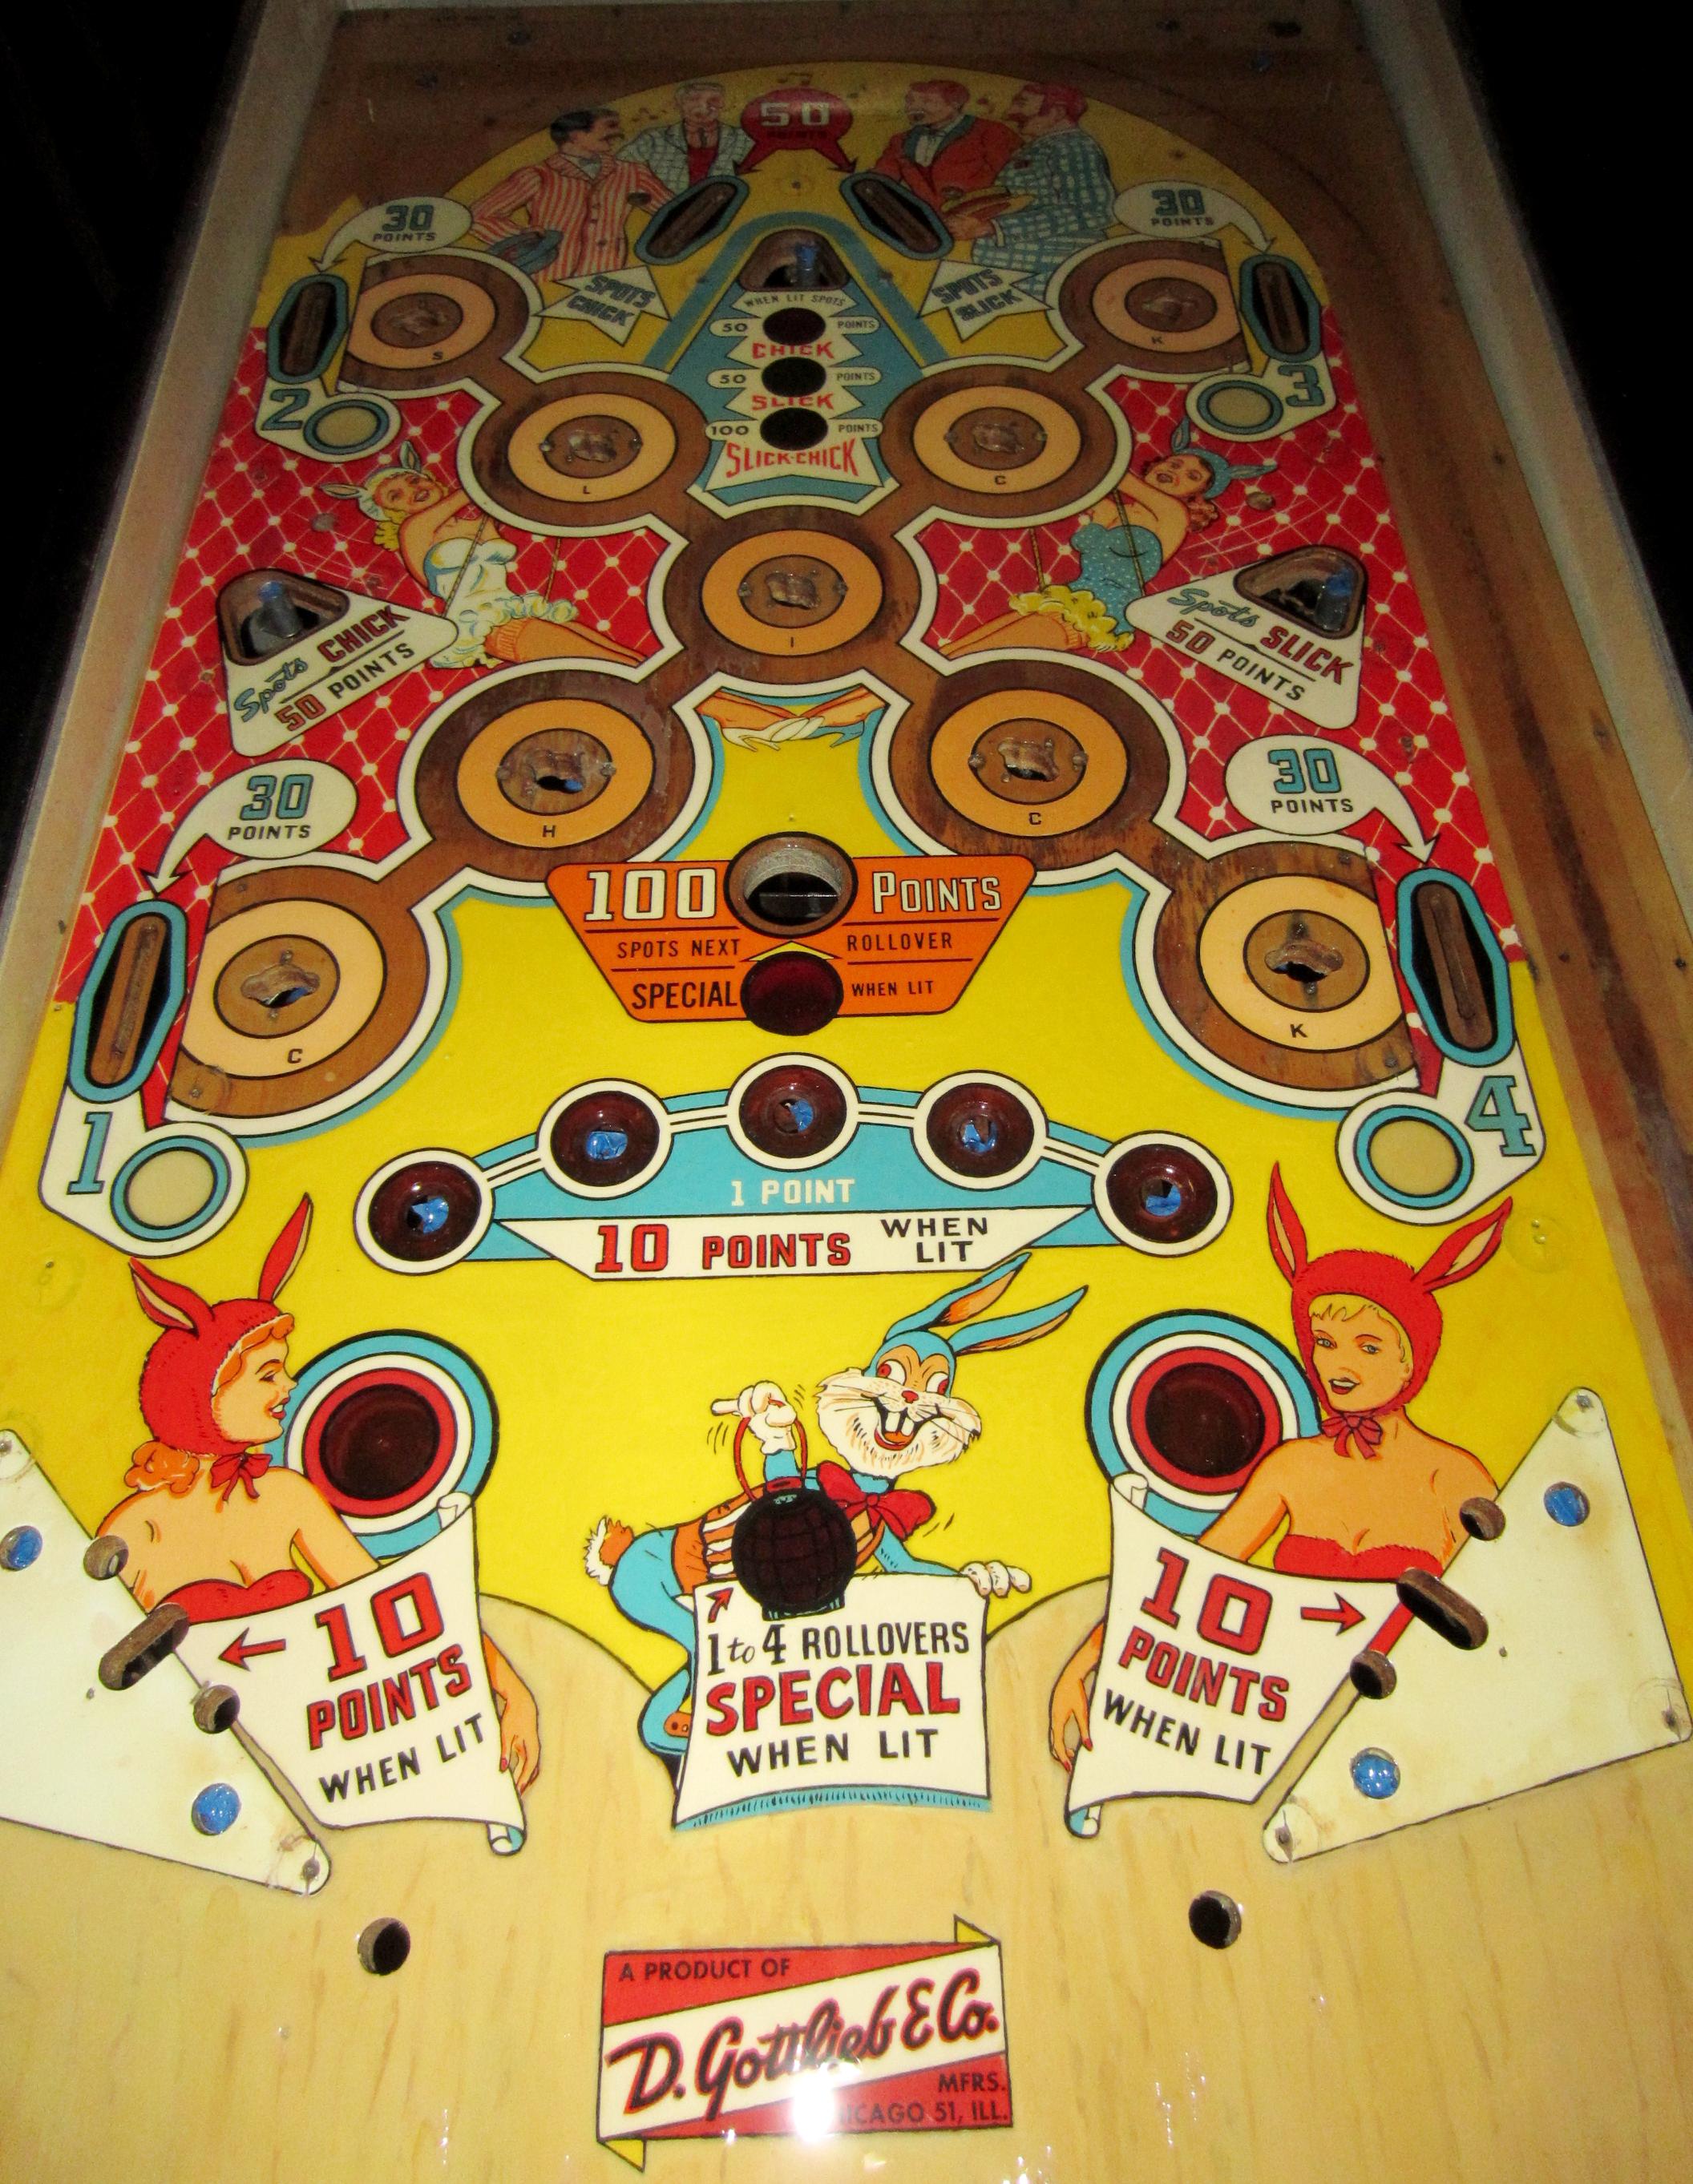
You can clearly see where the raccoon pooped on the playfield, right between the flippers. The damage to the playfield finish was pretty revolting. But here at the Detroit Pinball Club, we don’t let things like this deter us. After all, the 1963 Slick Chick is considered one of the best pinball machines made in the 1960s, we’re not going to let a little thing like raccoon poo ruin the machine!
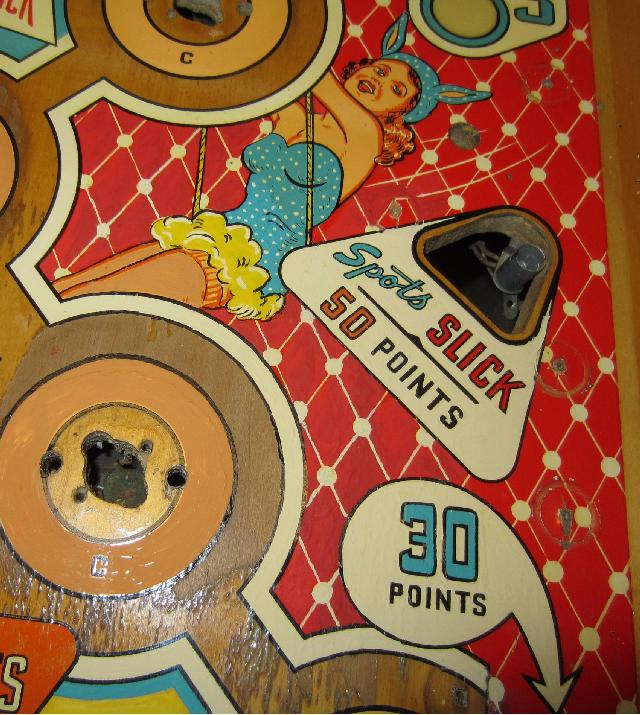
Here’s the spot that most concerns me. The rabbit in the middle will be tricky to recreate, as it has a lot of detail. And there’s no hiding the detail, as it’s right in front of the player’s face.
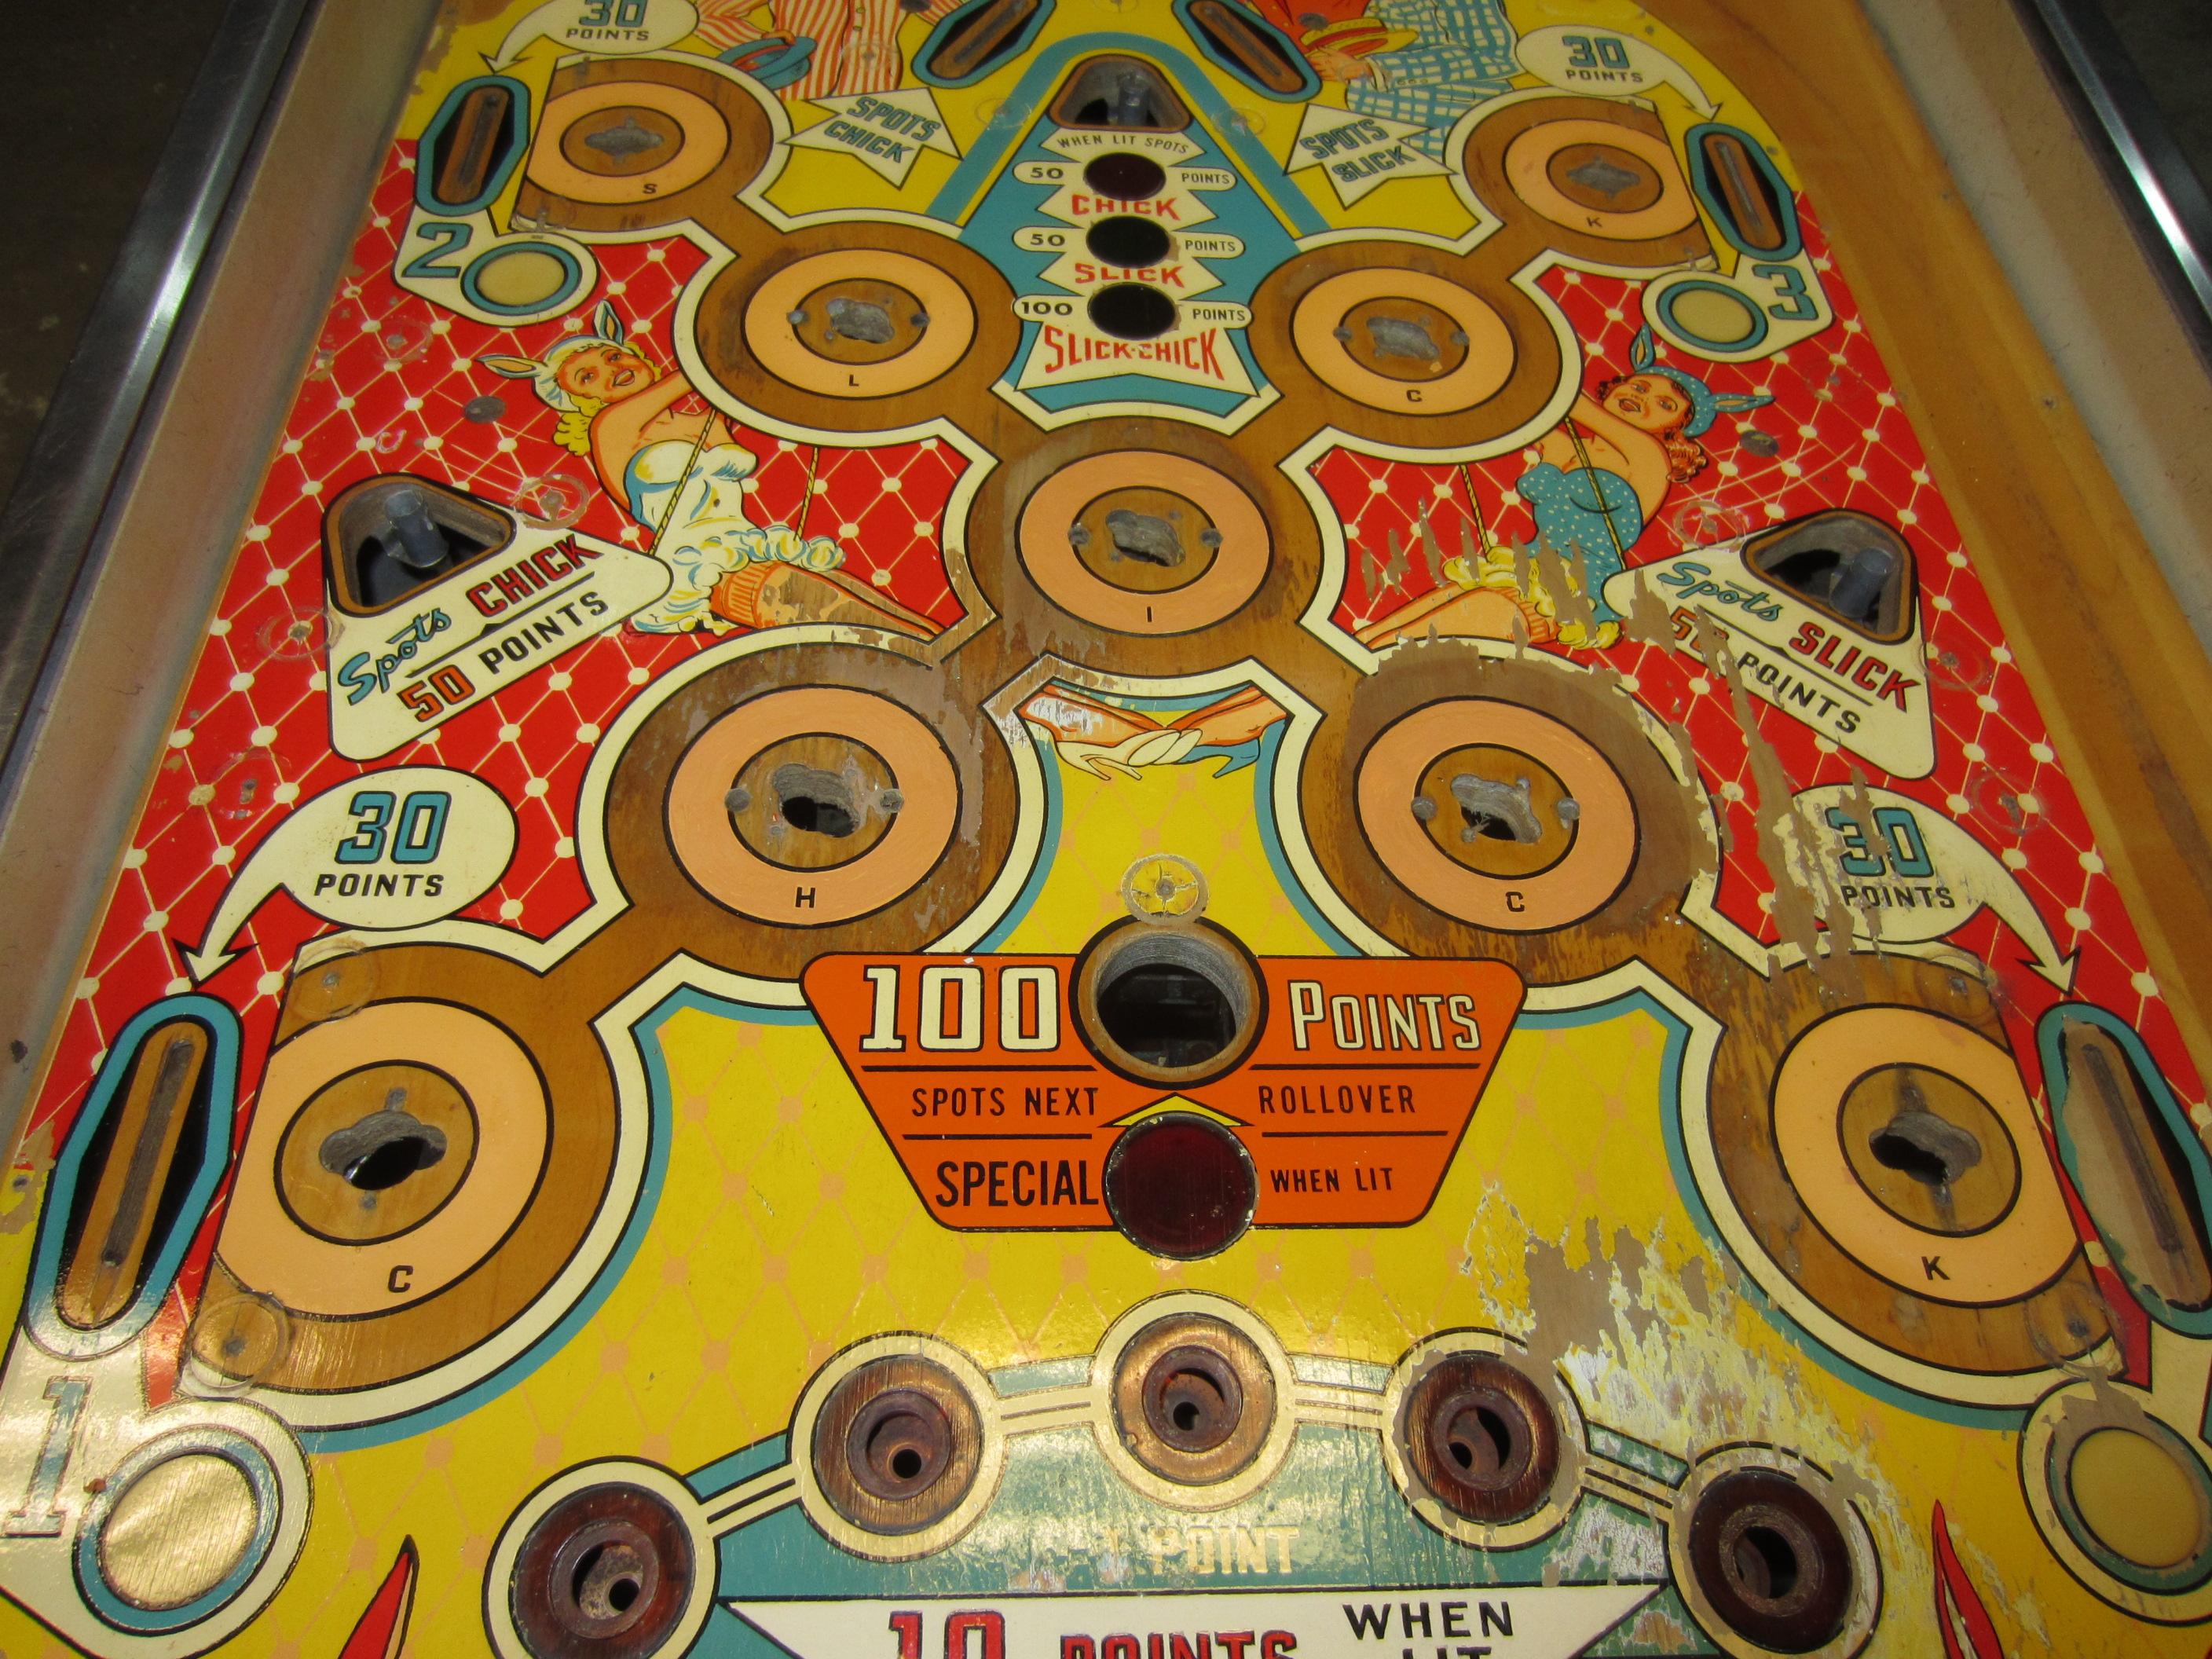
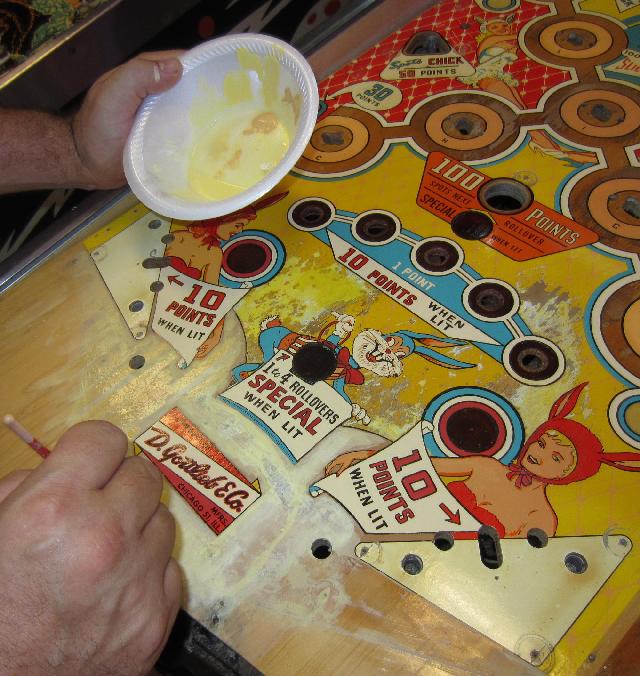
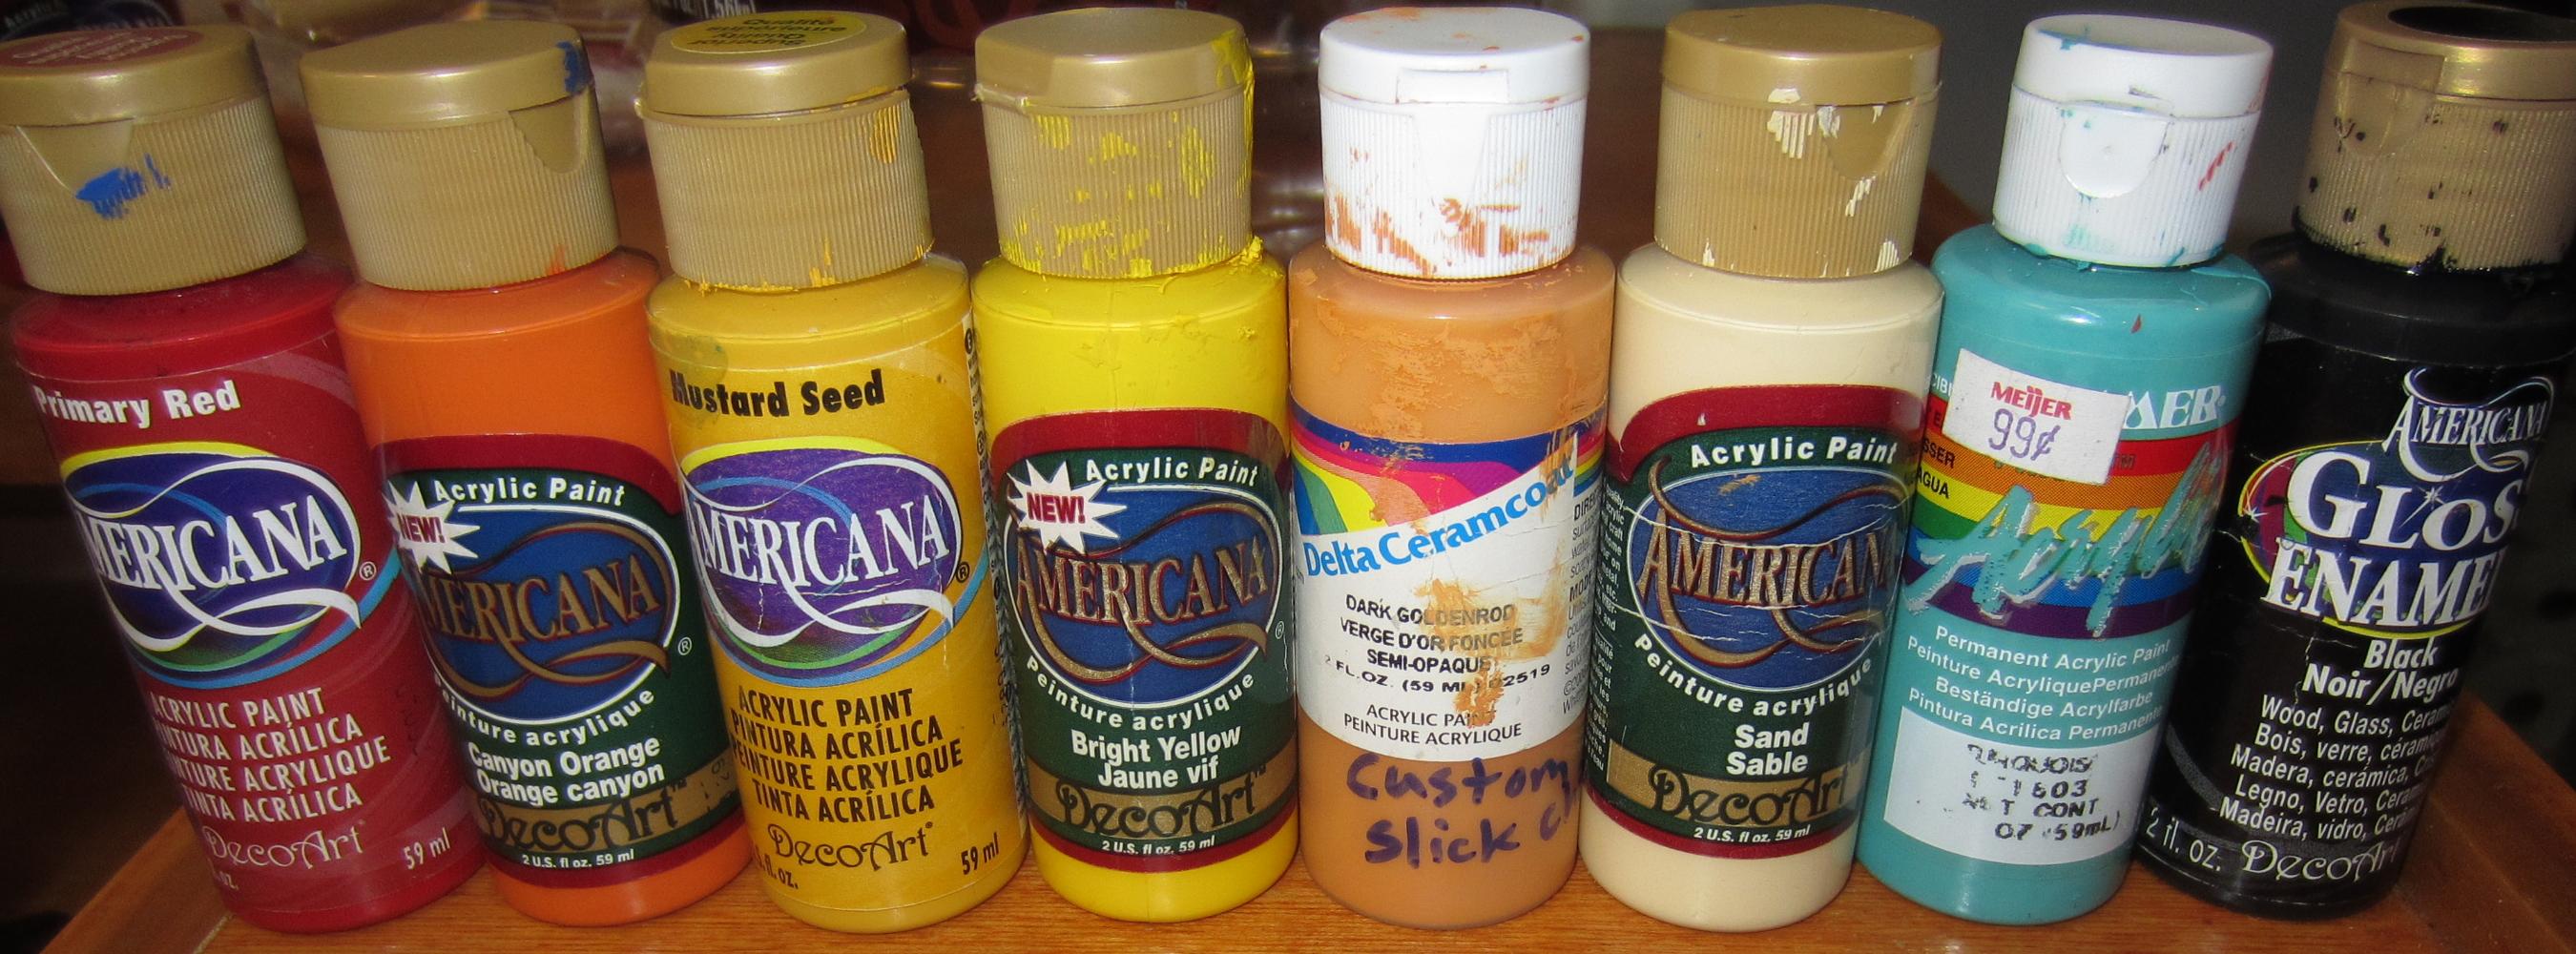
My opinion on playfield touch up is to always start with the easy stuff. It builds your confidence, and also shows you how things can progress. It kind of gets you pumped up about the project. If you start with the hard stuff first, you’ll get discouraged. So I start easy, re-painting the three lower center flesh-colored pop bumpers circles first (the H, I and the C bumpers.) But the way, I’m using inexpensive water based acrylic paints for this chore (bought at “Michaels”.) All this work is done “by hand”, and does take some time. Don’t think this is all done in an hour, because it’s not!
Now I break out the cream white paint, and so the “10 point” signs, and the center rollover buttons, the right “4” rollover, and the trim around the pop bumper circles. Also I re-painted the right chick’s face and arms with flesh colored paint. The trick is to get good color matches. It’s had to do, so I tend to just buy a lot of colors (at $1 a bottle, the paint is not expensive.)
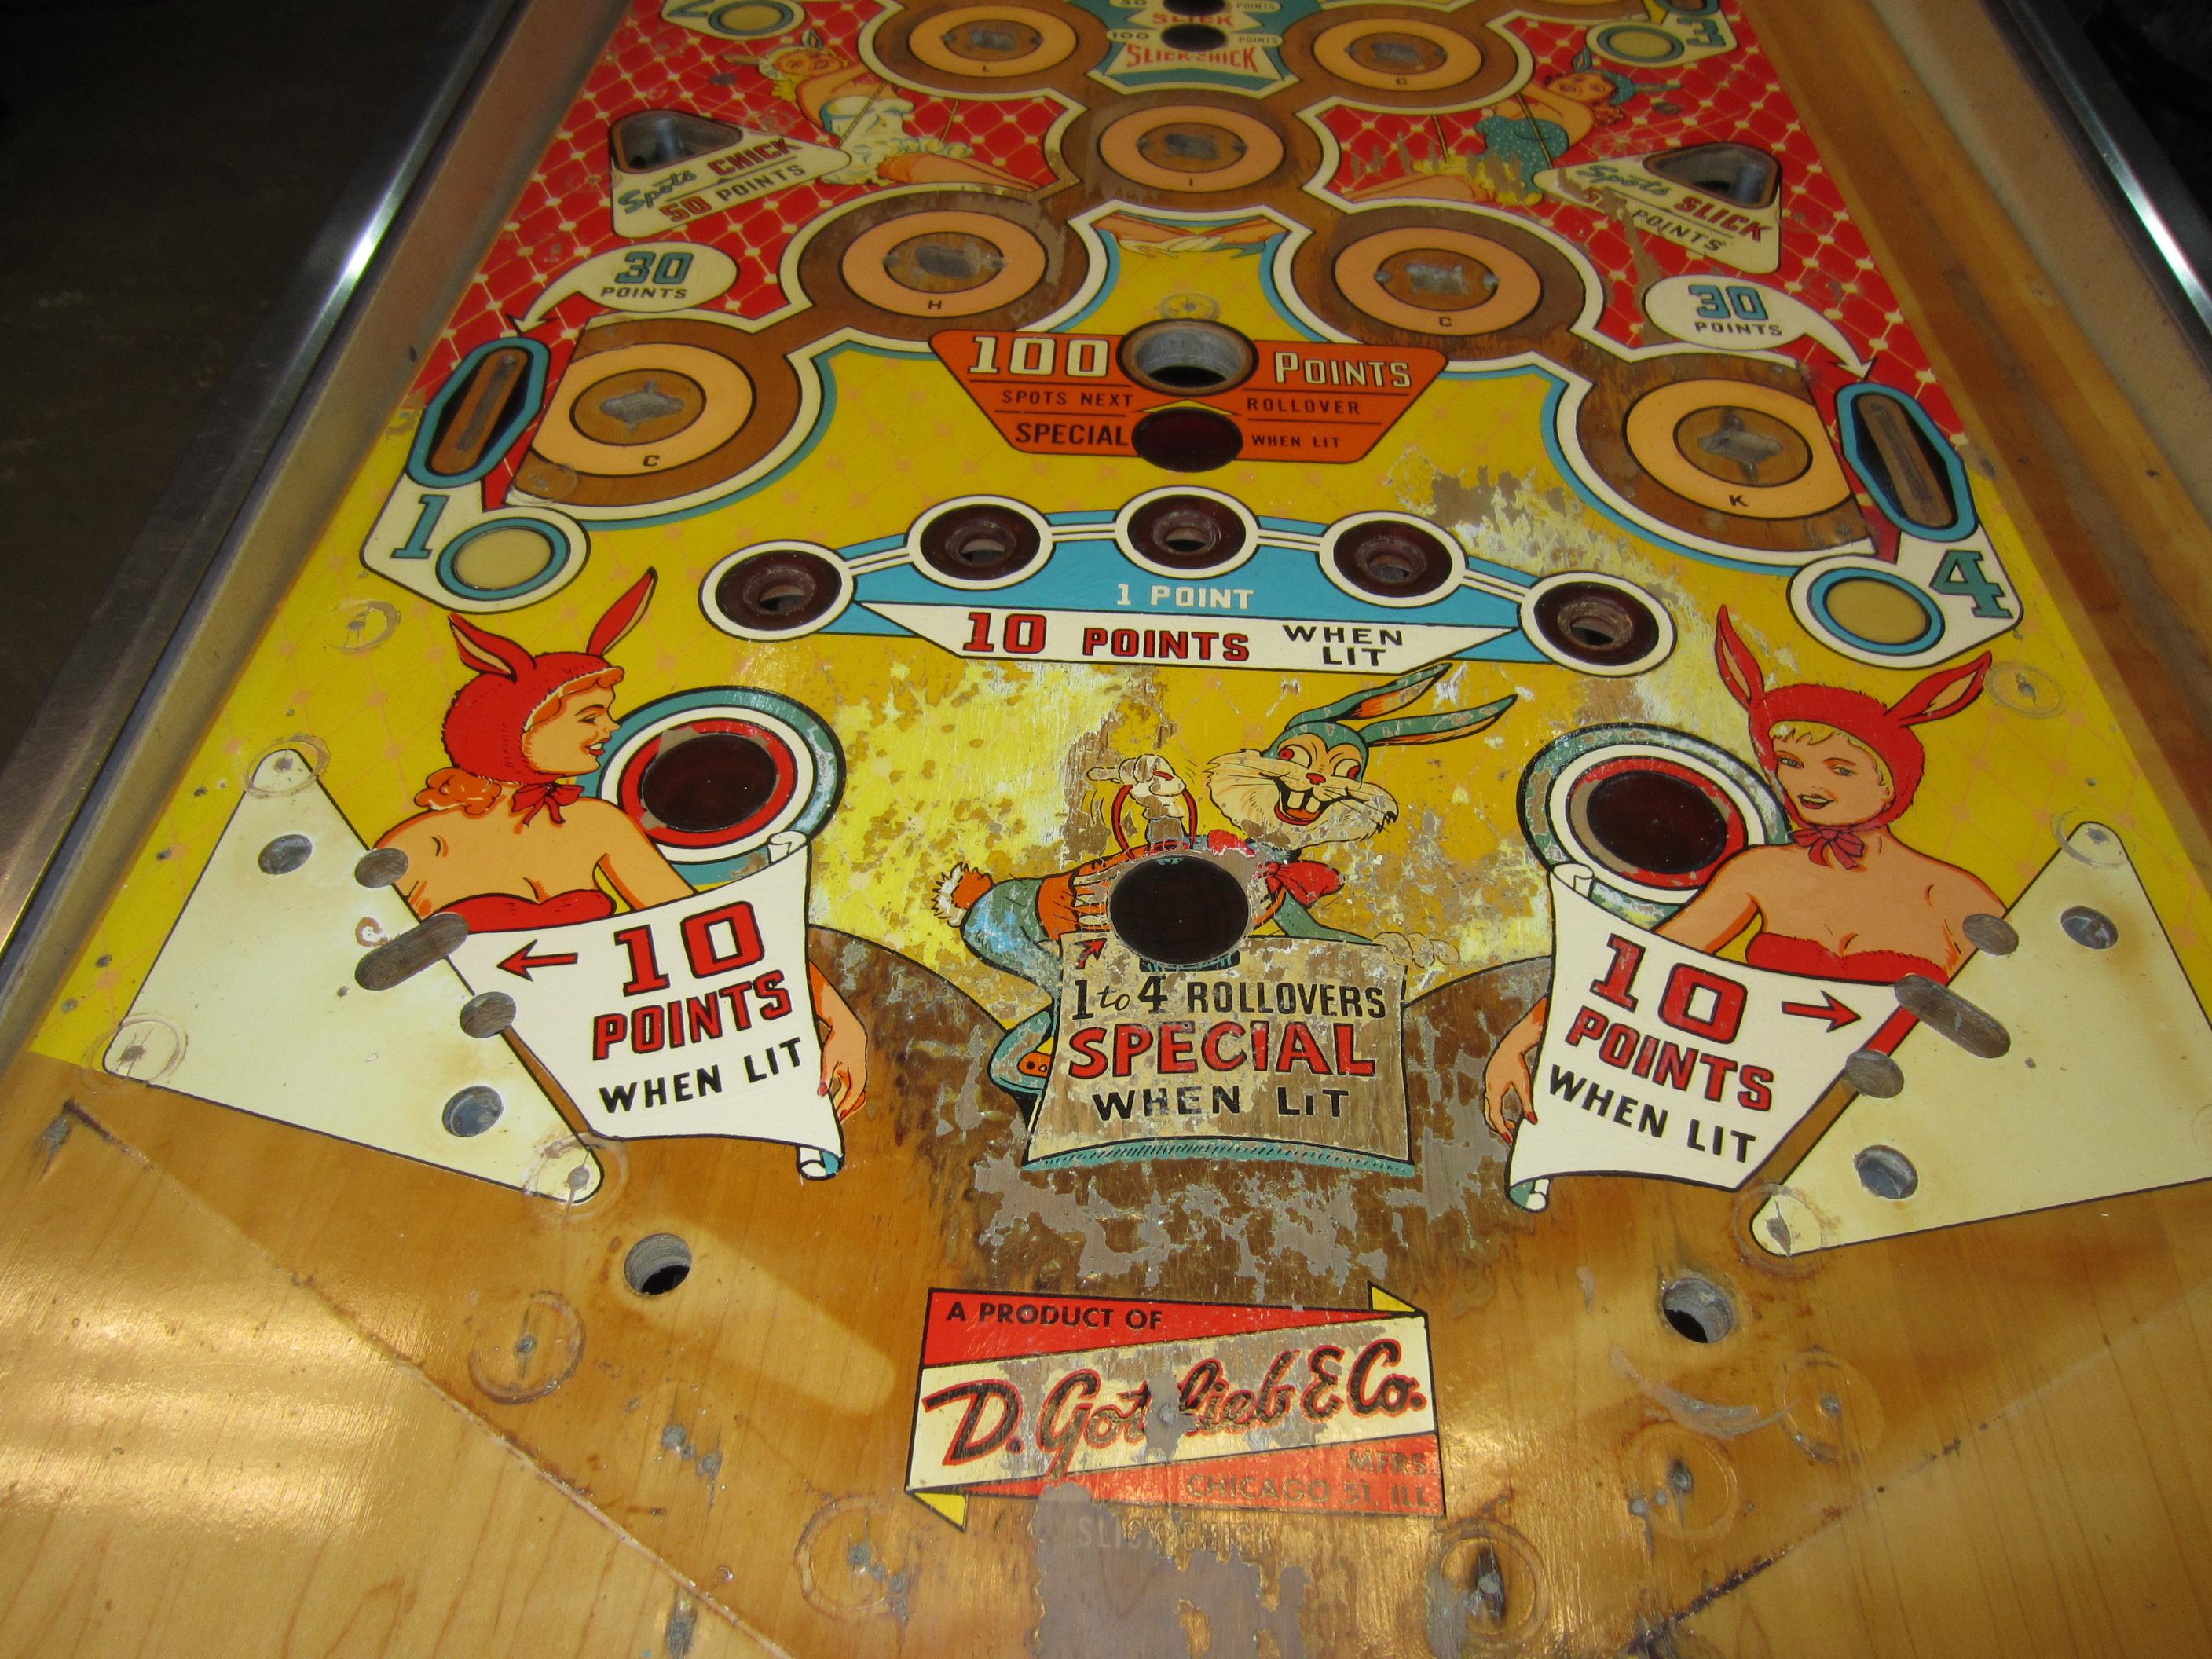
Time to break out the aqua blue and do the center “1 point” area, and clean up the right side rollover “4”. The “Gottlieb” logo between the flippers is cleaned up too with some white and red paint. Also the “30 point” area (top right) is cleaned up.
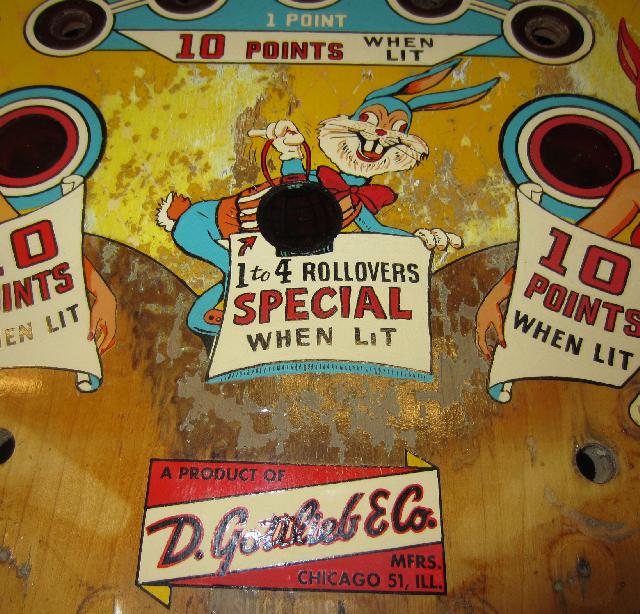
Now it’s time for the hard stuff, that darn pesky rabbit in the center! The other stuff has largely been “paint by numbers.” That is, with patience and a steady hand and good color matches, the prior work isn’t hard (just tedious.) But the rabbit, that’s more difficult. So I start with the ears and work down. I use a good picture of an original rabbit for reference.
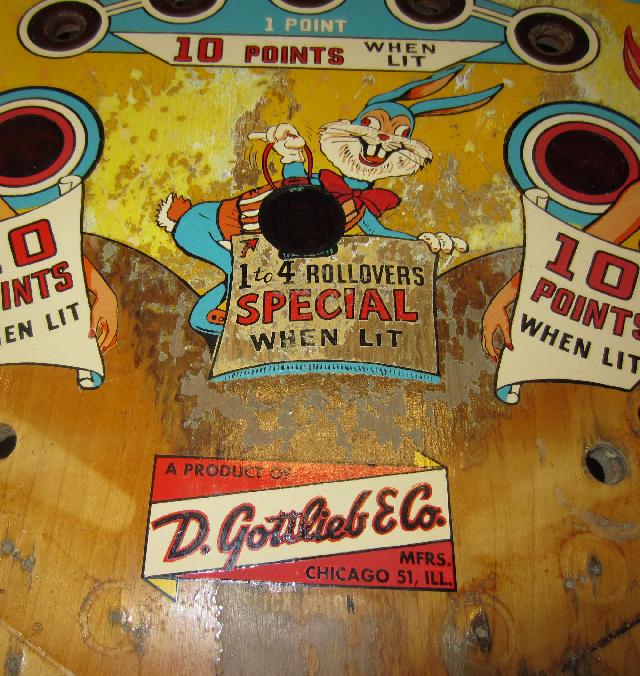
The sign just below the bunny is a hard paint too. Lots of detail, don’t want to loose the text or make it look touched up.
Next up is the wood grain (brown) area. It was so damaged I decided to just paint it “brown.” Could have sanded it, but frankly I’m not sure that would have ever looked right. This base brown is the “primer” for the blending coats.
So what’s happening here is a “wash” of color. Roger is the man for doing this, so he came in to save me! What he does is start with our “primed” area, and washes in some white. Next Roger washes in some yellow, because the clear wood area’s clear coat has yellowed over the years.
Now Roger adds the wood grain lines with some brown. Yes it does look “cartoony” at this point, but hold on… Now Roger washes the brown out with some “dirty water.” What the means is he have a small cup of water which he’s been using to clean the brush. But he doesn’t re-fill the cup, so the water is “dirty” with color. He uses this to wet the brush and take the cartoon out of the wood grain.
Roger then washes out the colors a bit more. The end result is pretty amazing. After the new clear coat is applied it will look even better.

What is left is the yellow bulk area. This is pretty easy to do, as it’s just a fill of a large area. “Cutting in” is difficult, but that’s about all that makes it difficult (besides the fact that it’s a huge area.) I’ll start with a yellow primer coat…

Then I’ll add the real yellow color I want on top of the primer coat. Yellow is a really hard color to paint, as the pigment is fairly transparent. So you need that primer or the yellow will never look consistent.
One last area to touch up is the red between the “3” and “4” rollover targets on the right side of the playfield, and the bottom of the chick’s blue shirt. Also the “50 points” wording was pretty much gone (well at least the “50” part of it.) This is just tedious hand work, but obviously it needs to be done.
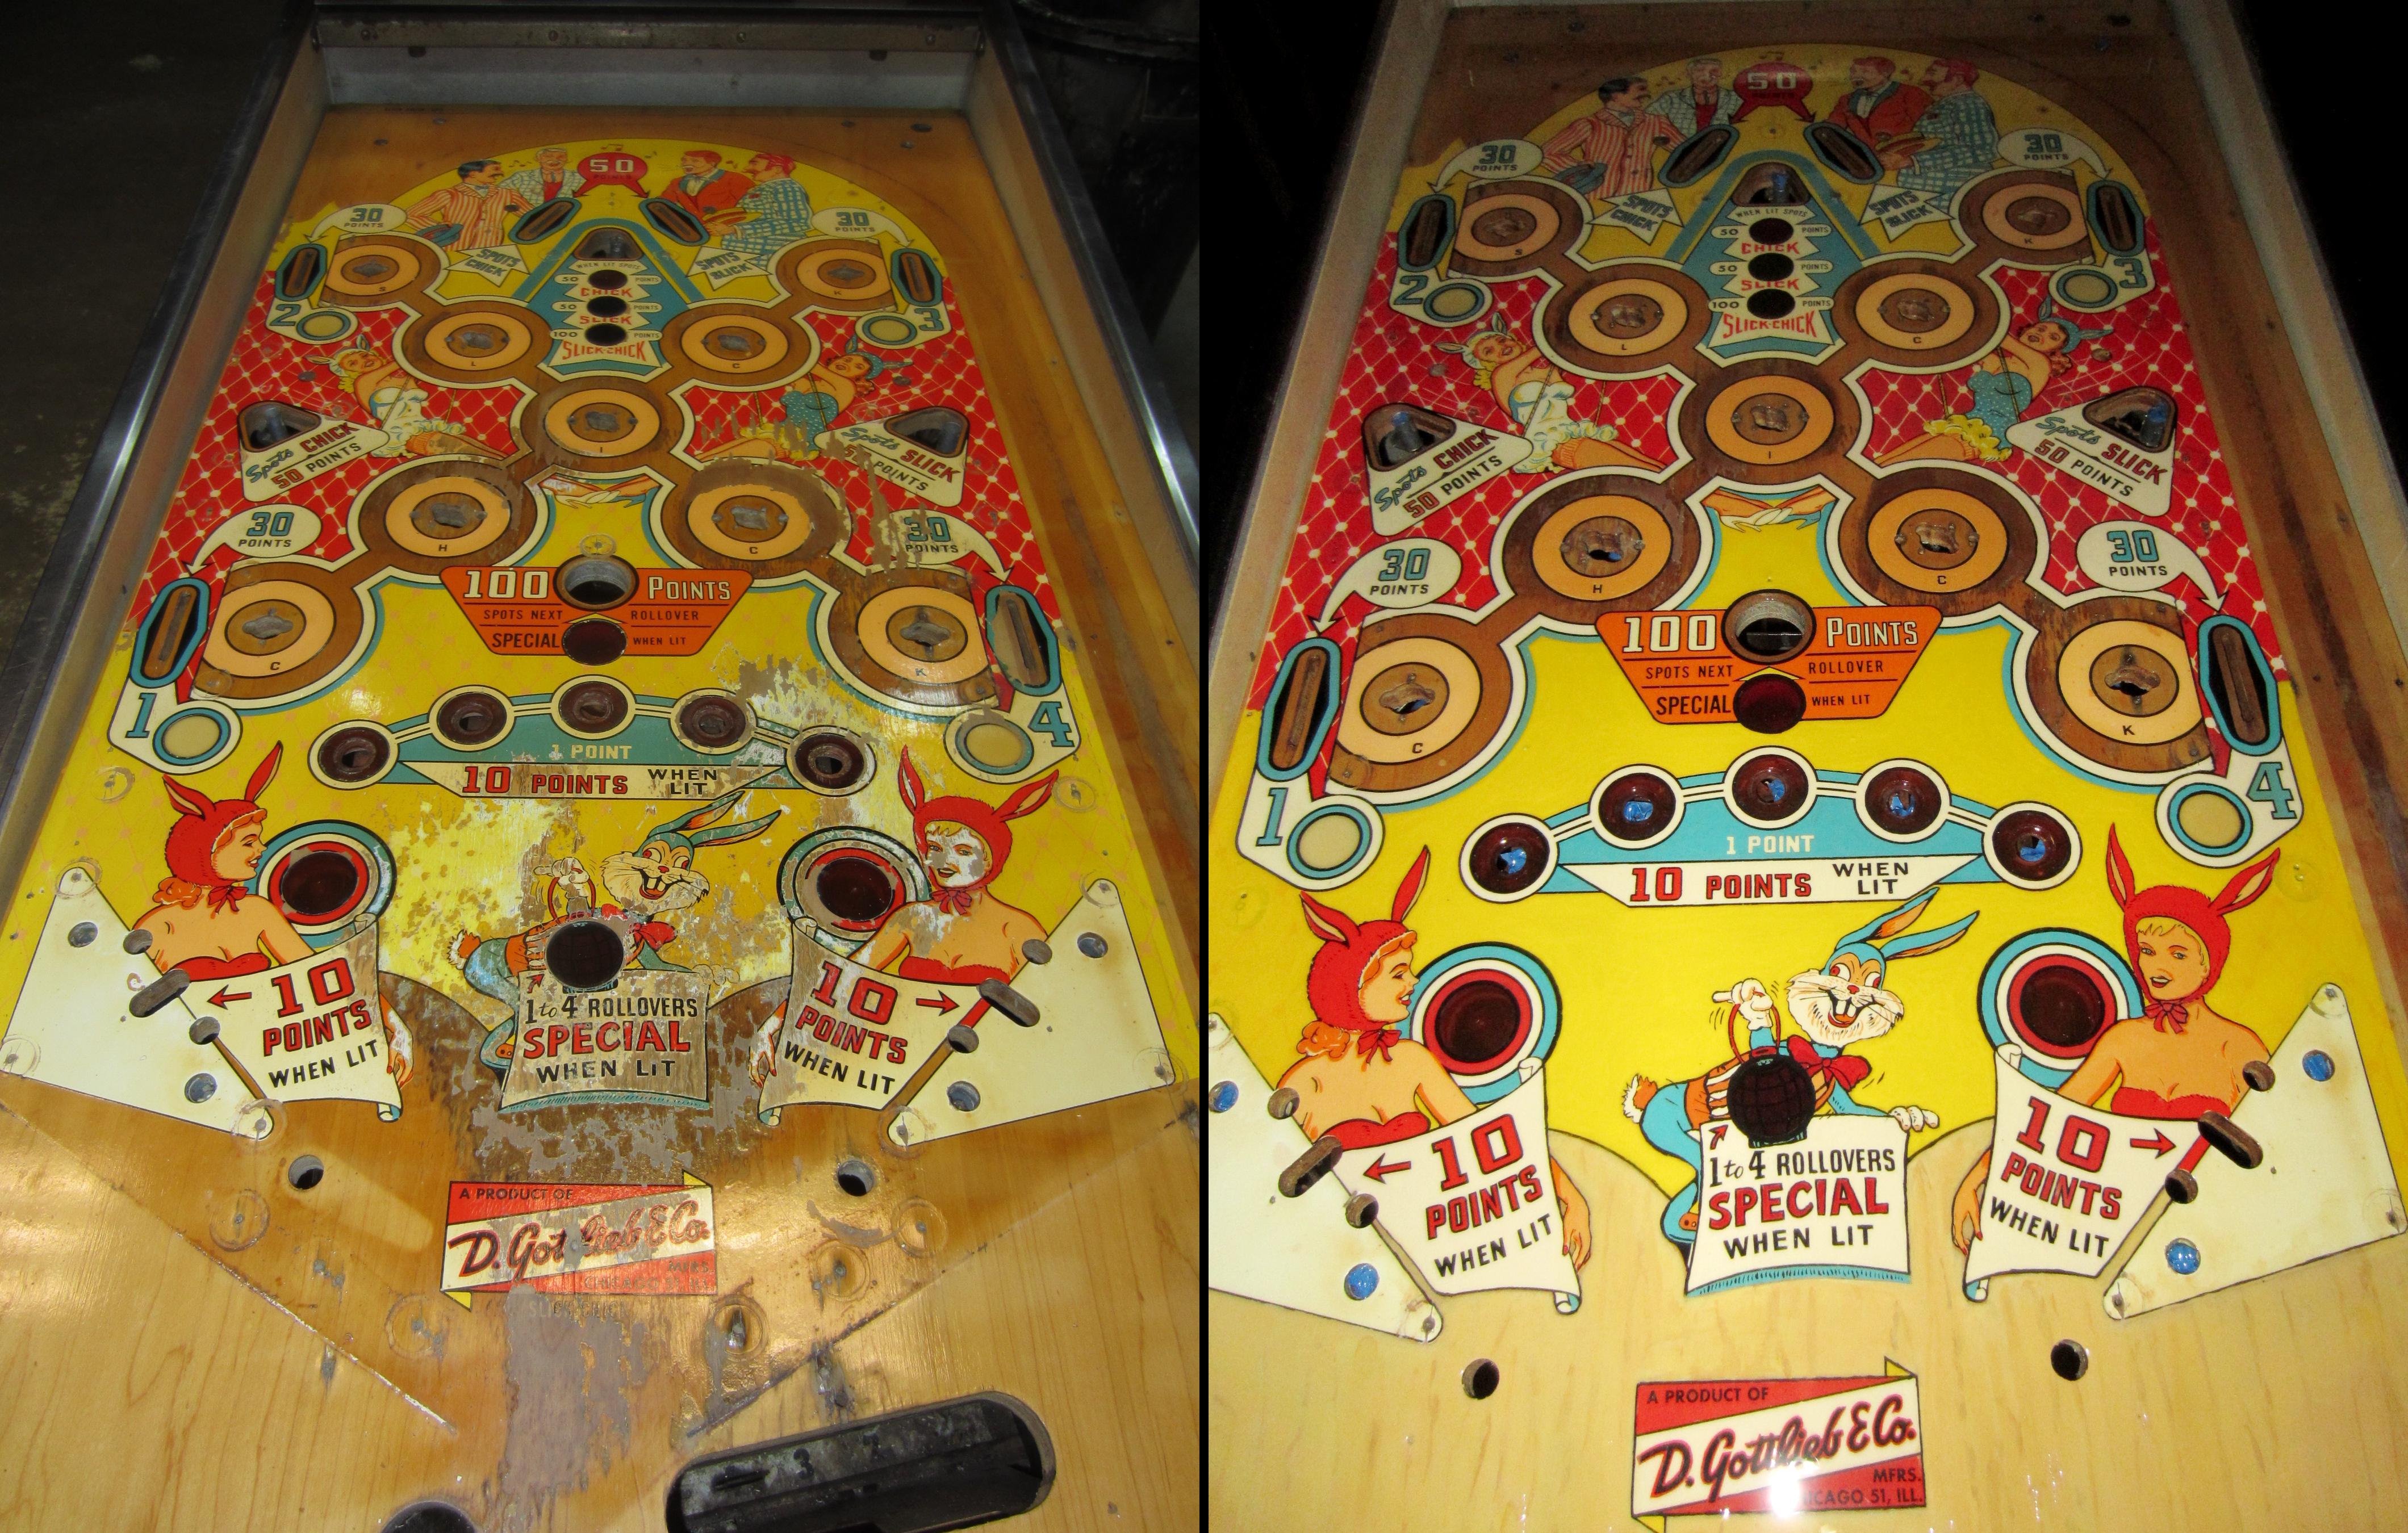
Before the touch up.
After the touch up.
Most of the touch ups are now done, but some small details need to be addressed. I have to tighten up the black key lines between the colors – many of them have gotten “washed” from overlapping paint. This I do with the edge of a razor blade. Those key lines which are not in good condition will be repainted with black acrylic paint. One thing I won’t be doing is cleaning up the clear wood between the pop bumpers. Though there is significant wear in the clear, I just don’t feel comfortable trying to make that “go away.” Let’s face it, this nearly 50 year old playfield is never going to be “perfect”, so I would rather not try and make it so. Therefore I’m OK with the clear coat wear and wood discoloration between the pop bumpers. “The enemy of good is better”, as I fear I will only make a small issue into a large issue if I try and address this tiny problem.

Now it’s for the clear coat. This will really blend all the touchups together nicely, and give a good consistent look to the playfield finish. I’m using a two part auto clear urethane for this task (“Shop Line”), with some fisheye eliminator. Below is a picture of the playfield after the clear coat has been applied. Looking at it a bit, I realize the natural wood color in the “X” between the pop bumpers probably should have been addressed. But remember, this is a 50 year old game, I really don’t want it to look “brand new.” So I’m OK with the worn clear look in this “X” area. Given how much work it was to match the wood grain between the flippers, I certainly didn’t cherish doing that *again* in the “X” portion between the pop bumpers. Because then that would require me to do the shooter lane too, and then the upper ball arch, and then ??? (Sometimes you have to know when to STOP and say, “the enemy of good is better.”) Besides once the wood side rails are installed, things will start to blend better, and my touch up decisions and mishaps will be less noticeable. (Trust me on this!)
For the record, it’s important to know “where you came from” in a project like this. So below is clickable picture of the before and after results. Was the outcome perfect? Heck no! But I can live with the faults. (By the way the total time of restoration was about 10 days.)
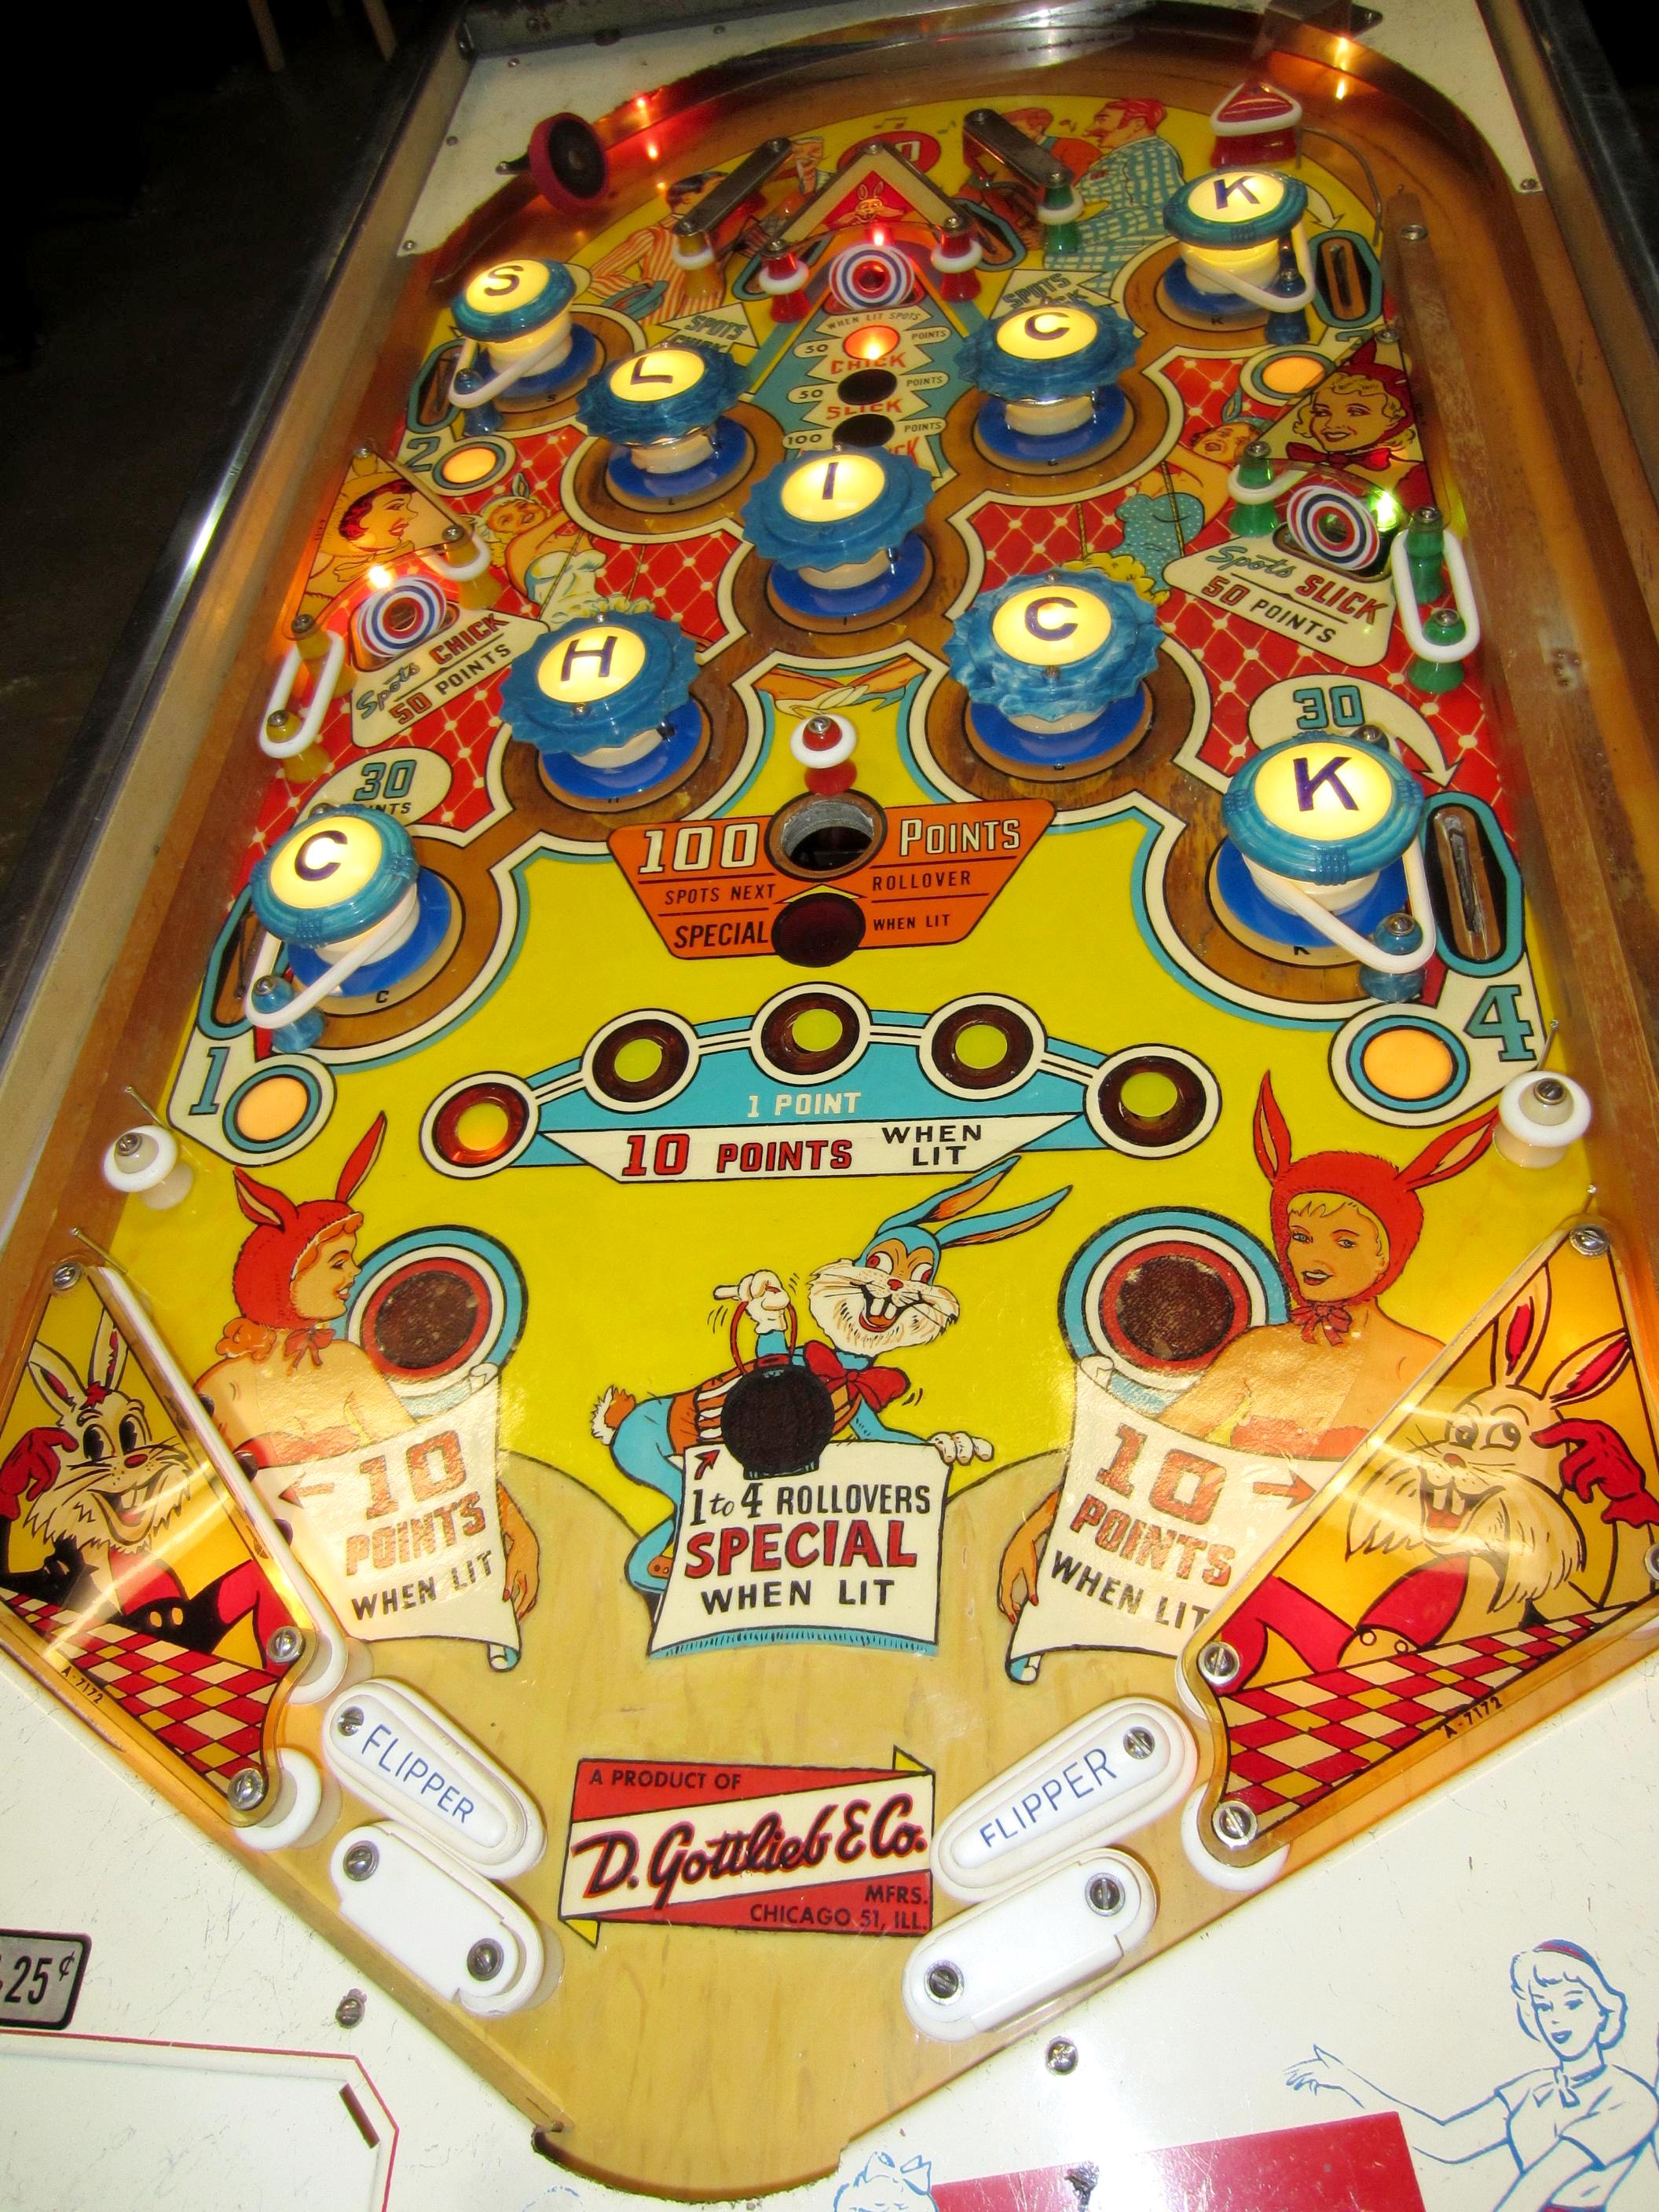
Here’s some pictures of the game completed and finished!
And for the record, here’s the colors I used to paint the playfield (in case you’re working on a Slick Chick yourself, and would like to know what I used for my colors.) The exception to this is the pop bumper ring/flesh color (that was mixed using the Delta Cream “Goldenrod” color and white at 50/50), and the wood grain color (again, custom mixed using a variety of colors, most not shown here.)
Video of the summer 2012 auction in Carleton, Michigan, where this Slick Chick was purchased:
[youtube 8Wk9WioptqA nolink]
So you ready to move on to Slick Chick #2??? (The other Gottlieb Slick Chick bought at the auction.) Well, maybe…
